Foodiva's Kitchen

Saturday, August 4, 2012

French Fridays with Dorie – Vegan Tomato Cheese Tartlets


This week’s French Fridays with Dorie assignment was easy enough, it’s a concept more than it is a recipe of tomato and mozzarella (or goat) cheese slices arranged over puffed pastry rounds. The perfect dish for when you have an abundance of tomatoes and very little time or idea on how to use them up.

What’s interesting here is that the puff pastry discs aren’t supposed to be cooked to puff-fection but rather, are flattened during baking by weighing them down with another baking sheet on top. They result in heavier but still crisp and flaky rounds, with the flat base making it easier to spread a pesto paste or olive tapenade on them and place the tomato and cheese toppings.


For the spread, I made some fresh lemon basil pesto from my plant that was growing out of control in the garden. It seemed I had run out of ideas on ways to utilize that basil too lately, so what a relief to be able to store some of the leaves in a jar in the form of pesto. 

I’m also slowly trying to give up dairy products (it’s damn hard, given my love for baking and desserts!) so this week, I used store-bought vegan puff pastry and also came up with a quick and easy version of mozzarella cheese. And what is quicker and easier when it comes to setting ingredients in a semi-solid form than agar agar? Yes, it seems odd, but the texture of the vegan cheese turned out very similar to soft mozzarella. Plus it crumbles and shreds too if the consistency is made a little thicker and it sets firmer. Think healthy pizza, yay!


I haven’t shared my own recipe with my FFWD posts in a long time, so I’m happy to share this cheese one with you. It’s basically a mix of silken tofu, agar powder (not flakes), ground cashews and almonds, rice vinegar and garlic. Blitz everything in a food processor, bring the mixture to a quick boil and pour into a mold, leaving it to cool down and then set in the fridge for several hours. If you have access to this non-dairy cream substitute, MimicCreme (I don’t), then just replace the nuts with a cup of this vegan cream and your ‘cheese’ texture will turn out smoother than mine looks here.

The blended 'cheese' mixture 

This vegan tomato tartlet salad, drizzled with balsamic vinegar, tasted better way than I expected. Vegan food in general tends to get a bad rep, because we do expect it to taste bland and often look boring, and as you can see that’s clearly not the case here. In many of my future FFWD posts, I’m going to show you how to bring sexy into vegetarian or vegan cuisine. I’ve had so many successful experiments with substituting ingredients for the real deal that I need to put them down as solid recipes and share them with all of you out there - before I forget it all! The French may not approve of my cheese blasphemy this week, but hey, sometimes I feel we should do what we need to in order to align the outside world with our evolving inner selves. :)


Have a peaceful weekend, everyone!

Homemade Vegan Mozzarella
Ingredients:
1 package extra soft silken tofu (about 340g)
1/2 cup ground raw almonds
1/2 cup ground raw cashew nuts
3/4 cup water
1/2 tablespoon salt
2 cloves garlic, finely grated (or 1 teaspoon garlic powder)
1 teaspoon rice vinegar
4 teaspoons agar agar powder

Method:
1. Place all ingredients except agar powder in a blender or food processor, and blend on high until it becomes a completely liquid consistency. Place the mixture in a small saucepan, stir in the agar powder, and allow to sit for 5 minutes.

2. Bring the contents of the saucepan to a boil over medium heat, stirring constantly. Be careful, as the hot mixture will sputter. Remove from heat and pour immediately into a baking dish or mold. 

3. Smooth over the mixture as if you were making a batch of brownies, then place into the refrigerator for a few hours until completely set. Use as you would like any of your favorite cheeses. It shreds, slices, and even melts like real cheese under a hot grill!


Thursday, July 26, 2012

5 Star Makeover: Inside Out Melitzanes Imam Baildi – Eggplant, Sesame and Fig Stuffed in Tomato


This month’s theme of the 5 Star Makeover Challenge hosted by our talented friends, Lazaro of Lazaro Cooks and Natasha of Five Star Foodie is Greek Meze. We were supposed to put our own spin on a classic Greek meze dish or create something new altogether to bring to the table.

Greek food is something that’s fairly unfamiliar to me, as I’ve never been to Greece and there aren’t any Greek restaurants out here in Brunei. My meze experience has therefore been limited to Turkish and Middle Eastern ones, and luckily there are many similarities between these and the Greek meze. So this is my take on an originally Turkish dish that’s become a Greek classic, Imam Baildi, literally meaning “the imam fainted”.


Traditionally, Imam Baildi are boatshaped, hollowed out eggplants stuffed with vegetables and herbs, and topped with tomatoes and/or cheese. In my version,  I decided to turn the Imam Baildi inside out and stuff the eggplants inside tomatoes instead. I could easily have used red tomatoes, but I quite fancied the idea of pairing tart green tomatoes against a sweet, savory and nutty filling. As it happened, there was an abundance of green tomatoes in my mother’s garden so I used those and they were perfectly bite-sized.

What I did was to scoop out and chop up the insides of the 6 small tomatoes and 2 eggplants, sauté all that in 2 tablespoons olive oil for about 10 minutes along with chopped dried figs, fresh oregano, ground cinnamon and cumin, garlic, onion until softened. That filling was then seasoned with salt and pepper and stuffed into the hollowed tomatoes, topped with black sesame seeds and these were roasted for 15-20 minutes in a hot oven, not too long so the tomatoes still retained their shape and had a bit of a crunch. 

I had read somewhere that during the Great Lent, about 40 days before the Greek Holy Easter, most Greeks would fast and avoid eating meat and dairy products. So this would be a suitable, quick and tasty vegan dish that could complement any meze spread in a Greek kitchen during that time.


Lazaro will be doing a round-up of all the participants’ meze offerings on Friday, and because I’ve already seen some fantastic and creative ideas from the others, let me assure that you won’t want to miss that post. You can recreate some of these dishes for munchies for when you watch the opening of the London Olympics that very same day. Better still, gather some friends and family round that day for a proper meze party to celebrate the Games!

Wednesday, July 11, 2012

Rosemary Garlic Flaxseed Kringel Bread

The smell of good bread baking, like the sound of lightly flowing water, is indescribable in its evocation of innocence and delight.
~ M.F.K. Fisher

I only just realized that this blog had surpassed its 2 year anniversary last May, but with with everything that was happening in my life around that time, it had completely slipped my mind. So yay, happy belated 2nd blogoversary to my baby, Foodiva's Kitchen! What better to commemorate the occasion than with a bread post? Now those of you who have been following this blog know that I am ever so slightly obsessed with beautiful breads, especially the baked, yeasty kinds. I blame it all on my time in Europe, when I found it quite impossible to walk past a bakery everyday without being drawn in by the waft of the freshly baked loaves. Oh, and walking out with at least one each time! 


So a while ago, I came across several posts featuring a traditional Estonian festive bread called Kringel Bread. Originating in Germany, it's a sweet bread often flavored with cinnamon and almonds and it's usually baked in Estonia for special occasions such as holidays and birthdays. Kringel just means 'circle' or 'ring' so the bread is basically one that's been twisted into the shape of a pretzel or a simple ring. 


I actually made this bread quite a while ago and the draft post had been lying dormant in my posting schedule  all this time, waiting for the day when I will have the desire to fine-tune it and finally press the 'Publish' button. I'm not quite sure why it took me so long to get this out because it really is a pretty and scrumptious tasting bread. Instead of a sweet-bread, however, I opted to make a savory one using a filling of fresh rosemary, garlic and flaxseed. And just because I was on a healthy streak the day I made this, I exchanged the plain flour with whole wheat flour...it made me feel better about scoffing down almost all of the Kringel on my own afterwards :).


It's an impressive-looking bread once it's baked, but don't be scared off thinking you can't make it as it's really quite simple to shape. Once you sprinkle the flattened dough with the filling, you just have to roll it up into a cylinder, slice it in the middle leaving one end intact, twist the two ropes around each other and finally join the ends together to make a circle. That's all there is to it.
Enjoy making this bread for your loved ones and friends and don't forget to be adventurous with the filling!

Off to Yeastspotting this goes!

Rosemary Garlic Flaxseed Kringel Bread
Ingredients:
Dough
300 g all-purpose or wholewheat flour (2 cups)
1/2 tsp salt
125 ml lukewarm milk (1/2 cup)
20 g fresh yeast (0.6 oz fresh yeast or 1 envelope active dry yeast)
30 g melted butter (1/8 cup)
1 egg yolk
1 tbsp sugar

Filling
50 g softened butter (1/4 cup)
2 tablespoons finely chopped rosemary
3 garlic cloves, minced
3 tablespoons flaxmeal/ground flaxseed

Method:
1. Mix the yeast and sugar with the lukewarm milk and let it sit a few minutes while the yeast bubbles and foams up.
2. Add the egg yolk, the melted butter, the flour and the salt, then knead the dough and shape into a ball.
3. Place the dough in a large, greased bowl, then cover and place in a warm space and let rise until doubled in size (about 1 hour).
4. Preheat oven to 200°C (about 400°F). Dust your work surface with flour, and roll the dough out to a rectangle with a thickness of 1cm.
5. Spread the melted butter across all of the dough, then sprinkle the rosemary, garlic and flaxmeal on top.
6. Roll up the dough into a cylinder and using a knife, cut the log in half length-wise but leave one end still joined up.
7. Twist the two halves together, keeping the open layers exposed as shown in the photo tutorial. Form into a wreath shape, weave the ends together and pinch to seal. Transfer to a baking tray (buttered or lined with a cookie sheet or silpat).
8. Bake for 30 to 35 minutes, until the top is golden brown. Cover with a foil halfway to prevent excessive browning of the dough.
9. Reduce the oven temperature to 180°C (350°F) after 5-10 minutes to stop it burning. Remove from oven and leave to cool on a rack for about 5 minutes before eating.

Friday, July 6, 2012

French Fridays with Dorie - Crunchy Ginger Pickled Cucumbers

Earth laughs in flowers.
~ Henry David Thoreau

A friend once told me that the way someone prepares food is an innate expression of their soul. I'm too scared to even ponder what my food says about me, nevertheless I couldn't resist turning this week's French Fridays with Dorie cooking group assignment into something that Dorie had probably never envisaged - visually, anyway - when she was writing up her award-winning cookbook, Around My French Table.


It's an easy recipe with no cooking involved, Crunchy Ginger Pickled Cucumbers. Dorie suggested that we cut the cucumber into chunks and add minced ginger and red pepper flakes to the pickling liquid. So what did I do? I sliced the cucumbers across into rounds and punched out holes in the middle using a round cutter I use for making donuts. And instead of mincing the ginger, I decided how lovely it would be if the ginger was turned into teeny flowers. My flower shaped fondant cutter proved handy for this task and I was glad it got some usage because having never ever worked with fondant, my exotic cutters were lying in my baking cabinet doing, well not very much. Please don't ask me why I even have so many of them in the first place....that's like asking why I have more pairs of shoes than I'll ever need. It's just one of those unresolvable mysteries of the universe!


In place of the red pepper flakes, I thought fresh sliced red pepper would complement the green of the cucumber and still give off some heat. For an extra dimension of flavor, you could sprinkle some minced herbs, either cilantro, parsley or chives on top of the cucumbers just before serving but I chose not too, because after cutting out all those miniature ginger flowers, why would I want to hide them? These pickles are quick to prepare and make such pretty picnic food, I will definitely be thinking up new ways of serving this up in future. Oh, and there will always be a more interesting way just around the corner!


Wednesday, June 27, 2012

5-Star Makeover - Raspberry Salmorejo with Balsamic Caviar

"Between soup and love, the first is better."
~ old Spanish saying


First of all, thank you for the outpouring of compassion and well wishes from everyone following my last post. I am very grateful and overwhelmed by how kind everyone has been, however soon after that grief started to kick in and I suddenly found myself in that weird place called 'shut-down'. Luckily I recognized this and immediately made the decision to take a hiatus from this blog (and also others) for a few weeks. If I hadn’t been coming round to your lovely blogs to say ‘Hello’ or ‘Wow!’ lately, well this is the reason.

All this isn’t even newsworthy, so why am I telling you about it? It's not that I think anyone out there is pacing for my recipes or stories, in fact I’m still amazed that in between the chaos of stuff on the internet and the lushness of life, someone out there would want to pause to read my stuff. I’m just trying to say that I felt sad, burnt out and needed some time out to recover, perhaps make some space for new things, more creative and loving things. I am not that type of person who can write, create or participate in something just for the sake of it, I needed to feel that it’s really coming from the heart or I’d rather not be doing it at all.


Anyway, now that my art-making, love-initiating engine has cooled down sufficiently, I’d like to restart it with this chilled soup recipe – Raspberry Salmorejo with Balsamic Caviar. Salmorejo is a typical dish from Cordoba in the south of Spain, it's similar to a traditional tomato gazpacho but richer and has the velvety texture of vichyssoise due to the addition of bread. As you can see in the above picture, I had picked a lot of tomatoes from my parents' farm last weekend and could have gone down the traditional tomato Salmorejo way. But I wanted to kick it up a notch for this month’s 5-Star Makeover Challenge and went with raspberries instead.


Berries in cold soup make a lot of sense to me, it's light, refreshing and perfect for warm weather. I just needed to carefully balance out all the flavors because this could have very easily turned into a smoothie rather than a savory appetizer. 

I served mine up with extra raspberries and brunoise-cut (very small cubes) bell pepper, basil and onion placed at the bottom of the serving glass. It makes for a lovely and flavorful hidden surprise for anyone eating this. To complement the raspberry flavor of the soup, I also made balsamic caviar out of balsamic vinegar and agar agar. A few flower-shaped croutons and a cucumber ribbon completed the dish. It was fun and very simple to make, and a great initiation into chilled soups for me - yes, it's my first time eating it too! 


Thanks to Lazaro and Natasha again for hosting this monthly event. I'm really glad I decided to participate and am looking forward to the round-up of all the chilled soups this Friday over here.

Raspberry Salmorejo with Balsamic Caviar
Makes: 4 servings

Raspberry Salmorejo 
100g stale white bread (1/2 baguette)
3 tablespoons olive oil
2 tablespoons raspberry vinegar
400 g (14oz) frozen raspberries
1/5 garlic clove, peeled
120 ml extra virgin olive oil
100 ml mineral water
1/2 tsp salt

1. Break the bread into small pieces and mix with the olive oil, vinegar and water in a bowl, Set aside while you make the soup.
2. Process raspberries with the rest of the ingredients in a food processor until smooth. Pass mixture through a fine sieve.
3. Put strained mixture back in the processor (rinse it beforehand), add the soaked bread and salt and blitz it into a smooth puree. Keep in the fridge until serving. It needs to be really cold before serving so allow for a few hours in the fridge before serving.

Brunoise of Raspberry, Bell Pepper and Basil
1/2 handful of basil leaves
75 ml (2.5 oz) extra virgin olive oil
25 g raspberries, sliced into 4
15 g peeled red bell pepper, cut in cubes
5 g of finely chopped onions
Salt

1. Process the basil with the olive oil until smooth.
2. Mix the basil oil with the rest of the ingredients and reserve.

Garnish
4 cucumber ribbons (cut them thin lengthwise with vegetable peeler or mandolin)
4 tablespoons balsamic agar caviar (see below)
Croutons

Balsamic Agar Caviar
1 cup light, vegetable oil
1/4 cup balsamic vinegar
1 teaspoon agar agar powder

Extra equipment: Needle-less syringe or small plastic pipette

1. Pour oil into a tall, vertical container such as a glass. Place the oil in the freezer for at least 30 mins. You need the oil to be very, very cold because you'll need to inject the agar agar into the oil later on.
2. For the agar solution, stir the agar powder into the balsamic vinegar in a small heatproof pan. Warm this up on the stove or microwave until it just starts boiling. Take it off the heat, let it cool for a minute and start to fill the syringe or pipette with the liquid.
3. Inject agar solution drop by drop into the oil, just underneath the surface. You can adjust the size of the spheres by the amount of liquid you inject. Let the droplet float down to the bottom of the glass. 
(Note:  The cold environment surrounding the agar droplet would cause the agar to solidify immediately. To get very round spheres, the glass needs to be tall enough for the droplet to form into a perfect ball as it falls slowly to the bottom. Note: If you're making a lot of spheres, the temperature of the oil may rise, so return it to the freezer to make it cold again).
4. Pour the oil through a strainer to retrieve agar spheres. You can re-use the oil. Rinse the spheres under running water to get rid of the oil and keep in the fridge if not using immediately. 

Assemble and Serve
1. In the bottom of a glass, place a base of the raspberry brunoise making sure you do not touch the sides of the glass.
2. Taking the same care, cover with raspberry salmorejo.
3. Finish with a ribbon of cucumber, a spoon of balsamic caviar, croutons and a pinch of salt flakes.
4. Serve immediately before it gets warm.


Friday, June 8, 2012

French Fridays with Dorie - Olive Oil Ice Cream Tart with a Quinoa Crust

Love is how you stay alive, even after you are gone. 

~ Mitch Albom

Both my parents hail from big families, with at least 10 siblings on either side. I therefore grew up surrounded by as much love as there was chaos and drama. When our massive family gets together a few times every year - up to 4 generations of individuals bearing similar genes -  we always needed to prepare food and anecdotes to entertain around 250 people! Ours is very much a matriarchal family, with my grandmothers acting as the glue that holds every one of us close together. 

I am dedicating this week's French Fridays With Dorie post to my beloved grandmother (my father's mom) who had left us for good last Monday. The past two weeks was hard on all of us because she had become very ill over that period of time. Except for my 5-Star Restaurant Wars commitment, blogging had been relegated to the back of my mind as I'd wanted to savor every moment that I could spend with my grandmother. She was was my confidante, my best friend since birth and she was unconditional love personified. Although I truly miss her physical presence, I am comforted by the fact that she is now at peace and that she will always be by my side no matter what.

Our last picture together.


So back to this week's Olive Oil Ice Cream. In all honesty, I forgot that this was the week for this recipe - okay, I also forgot today was Friday - until I saw my fellow Dorista, Patty, post something about her ice cream on Instagram. I was curious about the use of olive oil in ice cream and wondered how different it would be compared to regular custard only ice cream. Patty (sorry to keep using you as a reference point) also made a rustic apricot pie to go with her ice cream and that inspired me to want to make something else to go with my ice cream too. I just couldn't figure out what.... drew a complete blank, nada. While I was busy staring into space for inspiration, this packet of quinoa was staring back at me from the kitchen counter. Hmm...would quinoa make a good crust? Well, I decided to put it to the test, and lo and behold, it did make a good crust! It was pretty easy to make too, which was a real bonus.


To make two 3-inch tarts, I simply boiled 1/4 cup of mixed quinoa (mine was red, black and plain) and added a tablespoon of flaxseed meal to it while still hot and moist. The flaxseed becomes sticky and hence acts like a 'glue' binding the quinoa grains together. I then pressed the mixture into the base and sides of a mini-tart pan and left the crust to cool down completely while I made the ice cream. You can chill the crust in the fridge or freezer to firm it up further.

The plain nuttiness of the quinoa and flaxseed played off well against the sweetness of the ice cream. What I also loved was the contrast in textures, the silky smoothness of the ice cream versus the gentle chewiness of the grains. It felt like there was a micro-party going on inside my mouth while I ate this ice cream. Oh, those red hearts made from raspberry puree? They're for you, grandma. May your strength and love continue to live in all of us.


As I said, last week was a pretty intense time for me and my family. Despite that, I did manage to carry out last week's assignment of Lentil, Lemon and Tuna Salad. The intention to participate was there but my heavy heart just couldn't think of anything pleasant or engaging to write in a post to go with my dish. So I'm now taking the opportunity to share my pictures from last week in this post. I hope this doesn't turn into a  'two-in-one' habit...

I made a few adjustments to Dorie's recipe: I used yellow lentils instead of lentils du Puy, cilantro instead of scallions, lemon juice in place of preserved lemon and black rice vinegar instead of red wine vinegar. In spite of the changes, this dish tasted great and it's something I'd like to make again. And again :). I served mine wrapped in lettuce leaves and although it looked like a light meal, the lentils still managed to fill me up.

I'm pretty sure the FFWD site has been turned into an enticing ice cream parlor this week thanks to everyone's participation. If you'd like to have a virtual taste, head on over here.

Hope you all have a beautiful, sunny weekend :).

Wednesday, May 30, 2012

Cajun-Vietnamese Dessert - Vietnamese Mint and Lemongrass Ice Creams in Praline Cookies, with Chocolate Chili Truffles


I'm pretty sure many of you did a double-take when you read my post title above. *What could she have been thinking?* No, I haven't completely lost my mind because this is the way I always think, especially when there is a cooking challenge involved. Our regular, monthly 5-Star Makeover Challenge hosted by the dynamic Lazaro and Natasha has been taken over by a special 5-Star Restaurant Wars Challenge, starting now!

How it works is that members of this online cooking group are divided into teams and each team would come up with their own restaurant name and thematic key ingredients for their dishes or choose to feature a regional cuisine. The teams have all pushed their creativity to the limit, starting with their restaurant names, names such The Pink Goat, Le Morel, Marishky, Ciao Fiore! and Raphanus.

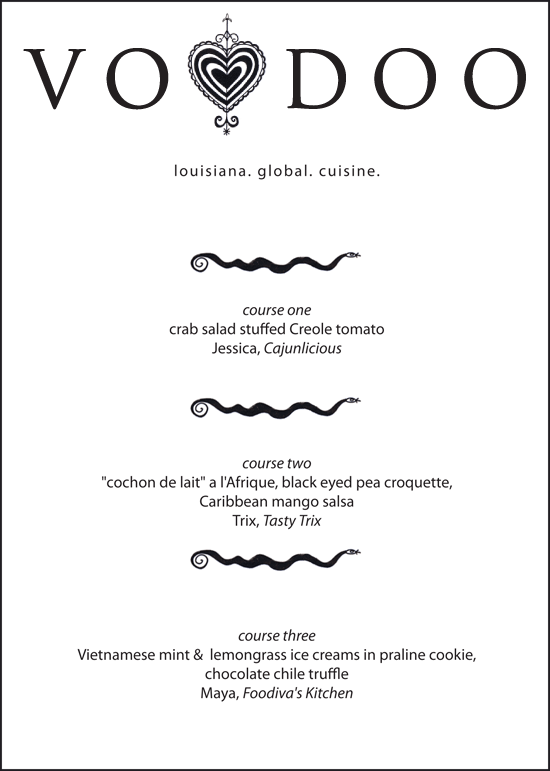
I am teamed with the fearlessly-talented Trix and Jessica and together we are pleased to welcome you to our sunny, little restaurant: Voodoo!


As the name probably leads you to conclude, the type of cuisine we have chosen to feature is from Louisiana. It was a natural and easy choice because Jessica is the author of Cajunlicious, a gorgeous cookbook featuring all-Cajun recipes while Trix had gotten married in New Orleans (by a Voodoo Priestess, no less) and is majorly enamored of the place, its people and cuisine. So how do I fit into all this? Well, I'm Asian and there is an unusual twist to Louisianan cuisine in that in recent times, Vietnamese food and culture have started to hold sway over its menus, alongside the historical influences of the French, Spanish, English, Native Americans and African Cultures. If you've ever had Cajun-Vietnamese fusion dishes such as the delicious Cajun lemon-grass chicken, garlic shrimp noodles and crawfish eggrolls, you'll get where I'm coming from.


We have divided the task of producing the restaurant courses into three, with Jessica kicking off the above menu with her beautiful and refreshing appetizer using Creole tomatoes and Trix making her delicious, bad-ass main course (with a name I don't even know how to pronounce properly!).

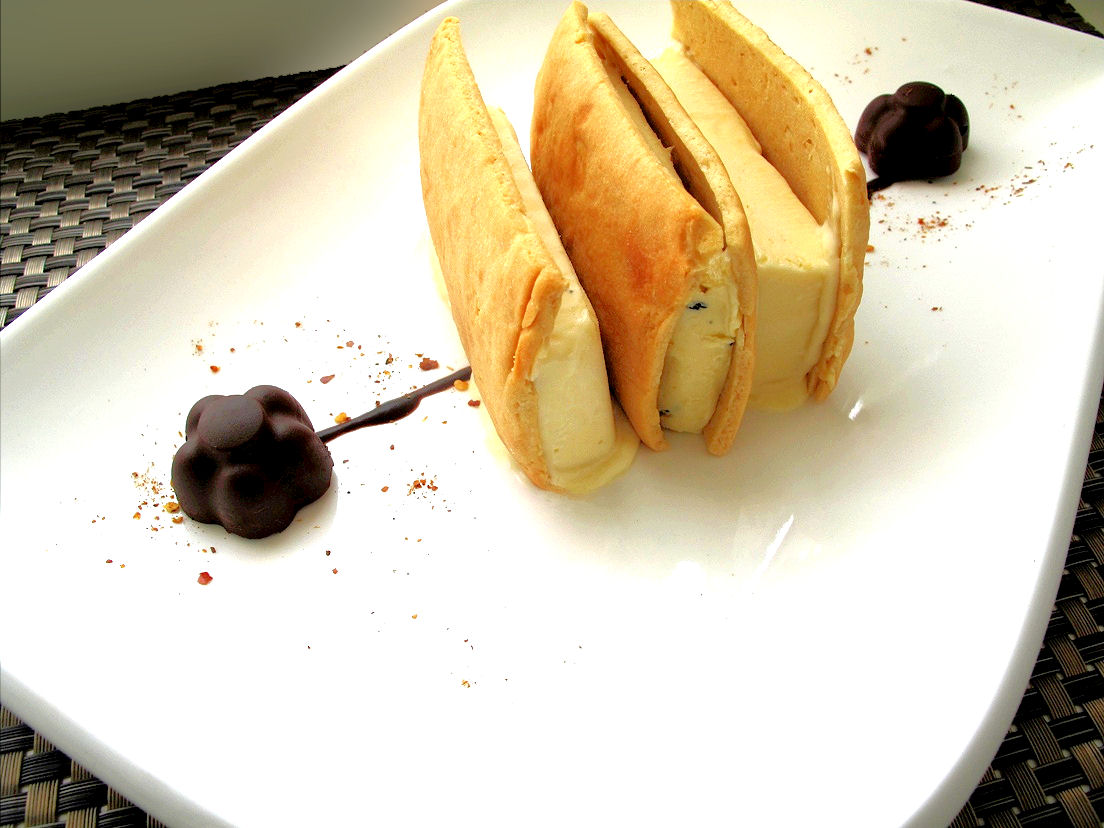
Dessert fell into my very willing hands. I knew a lot about Vietnamese desserts and flavors but very little about Cajun desserts. After consulting my two knowledgable team mates, I decided to put my own spin on the famed New Orleans Praline Cookies and Creole Cream Cheese dessert. I couldn't produce my own Creole cream cheese but I can certainly make those praline cookies and some Asian-flavored ice creams, and that was how my cookie-encased Vietnamese mint and lemongrass ice creams came about. And since chili is used profusely in both Cajun and Vietnamese food, what better than to serve that up in the form of a beautiful parcel of chocolate truffle?

L to R: Appetizer, main course and dessert
(simply click on the above links to see the other posts)

The two most used herbs and flavorings in Vietnamese dishes are easily lemongrass and Vietnamese mint. Vietnamese mint is native to Southeast Asia and is also known as hot mint, laksa leaf, rau ram, Cambodian mint and Vietnamese coriander. It's not related to the mint group of herbs though, but is more closely related to buckwheat and rhubarb. It's a key ingredient for cooking laksa, as it provides the typical sweet fragrance to the spicy noodle dish. In Vietnamese cuisine, it is often served raw and as a salad (as with Pho). Flavor-wise the herb is strongly pungent, with powerful citrus and pepper overtones. The lemongrass and Vietnamese mint together added a fresh flavor and depth to this iced dessert, with their subversive savory elements working really well to lift the sweetness. 

Vietnamese mint and lemongrass from my garden

For the chocolate chili truffle, I added powdered Thai chili flakes to spike up the heat on the plate. A mere 1/4 teaspoon mixed into 1/2 a cup of ganache proved spicy enough for me, but if you're feeling adventurous, you might want to add a bit more! Well, you're already eating at Voodoo, so what have you go to lose?

Chocolate chili ganache balls immersed in melted chocolate

At Voodoo, we have attempted to represent the long and colorful history of Southern Louisiana through each of our dishes. The appetizer represents the cuisine as an integrated whole; the main course pays homage to African and Caribbean influences; and the dessert, containing Vietnamese flavors and ingredients, tells the story of an evolution in Creole cuisine. Since history is an ongoing phenomenon, you know it wouldn't just end here. If I choose to relocate to Louisiana someday, you would surely see my stamp on the food there too. :)


We hope you've enjoyed your 5-star dining experience at Voodoo. If you're someone who eats dessert first, remember to check out the other two fabulous courses by my fellow Culinary Priestesses here and here!

The round-up of the 5-Star Restaurant Wars restaurants and dishes can be found here.


Vietnamese Mint and Lemongrass Ice Creams in Praline Cookies, with Chocolate Chili Truffles

Lemongrass Ice Cream
4 lemongrass stalks
1 cup coconut milk
1/2 cup heavy cream
1 tablespoon cornstarch
1/3 cup caster sugar
2 egg yolks

1. Cut the lemongrass stalks in half lengthwise (use only the white part in the middle, 4-6cm from the base) and bruise them with a rolling pin. Place in a saucepan, add the cream and coconut milk and bring to just below boiling point. Remove from the heat and leave to infuse for about half an hour. Strain to remove the lemongrass.
2. Whisk the egg yolks in a bowl with the cornstarch until pale. Gradually add the cream mixture, whisking constantly.
3. Return mixture to the saucepan and heat gently, stirring until the custard thickens. Remove from the heat and leave to cool to room temperature.
4. Churn custard in an ice cream machine until thick (about 15-20 minutes). Pour into a flat-bottomed container and press down top with the back of a spoon to flatten. You need the ice cream to be about ½ inch thick.

Vietnamese Mint Ice Cream
1 cup chopped Vietnamese mint leaves
1 cup heavy cream
1/2 tablespoon cornstarch
1/4 cup caster sugar
1 egg yolk
1 tablespoon black sesame seeds

Follow the same method as for the lemongrass ice cream above, but add the black sesame seeds at the end of the churning process and before freezing completely.

Almond Praline Cookies
1/4 cup butter, softened
1/2 cup brown sugar
1/2 egg
3/4 cup all-purpose flour
1 teaspoon vanilla
1/4 cup sliced almonds

1. In a medium bowl, mix together butter and sugar until fluffy. Beat in egg and vanilla.
2. Gradually add flour and gently stir in almonds. Optional: Refrigerate dough for about 1 hour to make it easier to handle.
3. Preheat oven to 180C/375F. Roll dough out thinly, about 1/8 inch thick on a cookie tray lined with silpat or parchment paper. Slice into even rectangles using a pizza cutter and bake just until the edges begin to brown, about 8-10 minutes. Cool on a rack and store in an airtight container until ready to use.

Chocolate Chili Truffles
170g/6oz bittersweet chocolate, chopped
2 tablespoons butter, softened and diced
1/2 cup heavy cream
1/4 tsp Thai chilli powder (very hot!)
100g/3.5oz extra chocolate, melted and cooled

1. Combine chocolate and butter in a bowl.
2. Microwave cream on high heat for about 1 minute until bubbly. Pour over chocolate bowl and mix until smooth. Stir in the chili powder and leave to cool to room temperature. Cover and chill in the fridge for several hours or overnight until ganache is set.
3. Working quickly, scoop a teaspoon of ganache and roll in between your palms to form a small ball. Make several of these, place on a lined plate and return to the fridge to chill and harden again (about 30 minutes). 4. Spoon melted, cooled chocolate into flexible silicon molds. Gently place a truffle ball into the middle of the mold and top with more melted chocolate. Let the outer chocolate coat harden completely before turning out. Use immediately.

Assembly:
1. Slice the two ice creams into rectangular slabs slightly smaller than the dimension of the praline cookies. 
2. Work quickly and stack the ice cream and cookie layers in this order: cookie-lemongrass-cookie-Vietnamese mint-cookie-lemongrass-cookie. Turn the whole stack on its side so it’s standing upright and serve immediately with the chocolate chili truffles. Enjoy!

Related Posts with Thumbnails