Foodiva's Kitchen: apples
Showing posts with label apples. Show all posts

Wednesday, October 26, 2011

(Almost) Wordless Wednesday - Scotch Bonnet-Thai Chilli Apple Hot Sauce


I went vegetable picking at my mother's farm last weekend and came back with plenty of organically grown goodies, including these super sweat-inducing Scotch Bonnets and Thai Chillies. I decided to brave it up and make a hot sauce from them - a REALLY hot sauce! You can cut down the heat by discarding half the seeds or deseeding completely (wimp!) but I left all the seeds in. And added an apple for texture. Whoooah mamma! That's all I can say :-).

A lot of sputtering and gasping for air was involved in the making of this hot sauce, but you may be pleased to know that no long-term damage was caused. At least, I hope not.

Scotch Bonnet-Thai Chilli Apple Hot Sauce

Ingredients:
1 teaspoon vegetable oil
18 fresh Scotch Bonnet peppers, sliced and seeded
6 fresh red Thai chillies, sliced
6 cloves garlic, sliced
1/2 cup onion, diced
3/4 teaspoon salt
2 cups water
1/4 cup distilled white vinegar
2 tablespoons white sugar
1 apple, peeled, cored and sliced
1 lime, juiced

Method:
1. In a large sauce pan over medium-high heat, combine oil, peppers, garlic, onion, and salt; cook for 5 minutes, stirring frequently.
2. Pour in water and apples, and cook for 20 minutes or until the ingredients are soft. Stir frequently. The mixture should reduce down a bit. Keep an eye on it so it doesn’t burn or dry out too much. When it starts to look like it might dry out, add about 1 to 2 tablespoons of extra water.
3. Remove from the heat, stir in vinegar, sugar and lime and allow to cool.
4. Meanwhile take your glass jars/bottles and sterilize by either boiling in water or heating in the oven for 5 minutes.
5. Transfer the mixture to a blender, and puree until smooth. Add the sauce to your sterilized jars, seal and allow to cool completely. Keep refrigerated.

Notes:
Leave some of some or all the seeds in for a spicier sauce. Replace the Scotch Bonnets with habaneros or jalapenos for a "milder" sauce or if Scotch Bonnets are not available in your area. Use peppers of the same color to keep the sauce a consistent color.

Once opened store the sauce in the refrigerator. The sauce should keep for several months unopened and at least 12 weeks once opened and refrigerated.

Thursday, September 29, 2011

5-Star Makeover: Teriyaki Chicken with Dragonfruit Ravioli and Apple-Plum Chutney, and a Charitable Cause


Today marks my first participation in the 5-Star Makeover challenge hosted by Natasha of 5 Star Foodie and Laz of Lazaro Cooks! So honored to be cooking amongst these very creative lot. I've left it till the very last minute because the theme this month stumped me a little...it's 'Cooking with Wine'. 


If you're a regular here, you'll know that I've never featured wine on this blog for the simple reason that we do not drink or cook with it. But hey, rather than back out, I thought this will be a great opportunity to be creative and look for alternatives that could possibly fit the challenge. And in my manic thinking (for that is the state I normally get into during a creative process), this is what I came up with. It's Teriyaki Chicken with Dragonfruit Ravioli and Apple-Plum Chutney, which I can confidently declare is not a dish I grew up eating! These are simply memorable fragments of the food I loved to eat whilst travelling or living abroad. Hah...at least that's my story (in case mom asks), and I'm sticking to it! :-). 

Monday, July 18, 2011

Secret Recipe Club - Homemade Nutella Apple Coconut Chocolate Pop Tarts

I wish all my friends' houses were connected to mine via secret tunnels.
~ Blue Lady at tumblr.com

Whenever the Secret Recipe Club event rolls around, I feel as if I'm being given the opportunity to bear someone a precious gift. Not only to the blog owner that I'm assigned to by the event host, Amanda of Amanda's Cookin', but also to you, my friends and readers. So this month I'm lucky enough to get Savor The Thyme owned by the incredibly hip and talented Jennifer. I'm not sure why I've never come across her blog before this assignment but once I looked through it, I was hooked. There are plenty of healthy recipes using fresh and 'real' ingredients that I felt rather spoilt for choice. More than that, there is a paragraph in her 'About' page that sums up everything I myself personally value where she says:

"I believe in a healthy lifestyle and family: To us that includes being healthy physically, emotionally, and spiritually. It includes great times with friends, life experiences and lots of hugging and laughing."

Well, I don't know you from Eve, Jennifer....but I think we could be psychological twins! I hope you will view this attempt at one of your recipes as a gift from me, 8000 miles away. To everyone else, go and discover Savor The Thyme now, for that is really my gift to you. 

Wednesday, April 13, 2011

Happiness is an Apple Tartelette


Did you know that in Bhutan, there exists a Gross National Happiness Index? That's right, they officially rate their citizens' happiness alongside their GDP as one of several main economic indicators. Their King believes that happiness is an indicator of good development and good society, and with all the bad things happening around the world recently, I think it won't hurt for us to buy into this concept too. :-)

Bright, sunny skies almost always invoke feelings of intense happiness, at least in myself. However, the day I made these, it was raining and the skies outside were dark and grey with rolling clouds (hence the dull photos, sorry). I was determined to stay lit up inside though in the company of these wonderful Sweet Biscuit Apple Tartelettes. 

Have glass, will cut

If you remember back in February, I made a Plum Cupid's Cobbler topped with sweet cream biscuits and for the tartelette base, I simply used the same biscuit recipe. Say you were me, you'd probably make loads of this biscuit dough in one go and freeze the remainder so that whenever you feel like it, you can just defrost the cookie-like dough and make simple tart bases like this one.


I often think the easiest, simplest things can turn out to be the most beautiful things (although I may have trouble remembering this and tend to go overboard with some recipes!). Funnily enough the older I get, the more I realize how very little it takes to make me happy. And these apple tartelettes, yes definitely, just a whiff of them lifted my spirits high!


The recipe is short and yes, sweet. Have fun, stay happy!

Sweet Biscuit Apple Tartelette
Makes 8 (3-inch diameter)
Ingredients:
Sweet Cream Biscuit dough (half the Cupid Cobbler's recipe)
2 red apples
3 tablespoons cinnamon sugar
butter, softened

Method:
1. Preheat oven to 200C/400F. Prepare the cream biscuit base first.
2. Place dough in between two sheets of wax paper and roll out thinly to about 1/2 cm thick with a rolling pin. Using a 3-inch cookie cutter or rim of a wide glass, cut out discs in the dough. Transfer the disks onto a baking tray lined with parchment or non-stick baking paper.
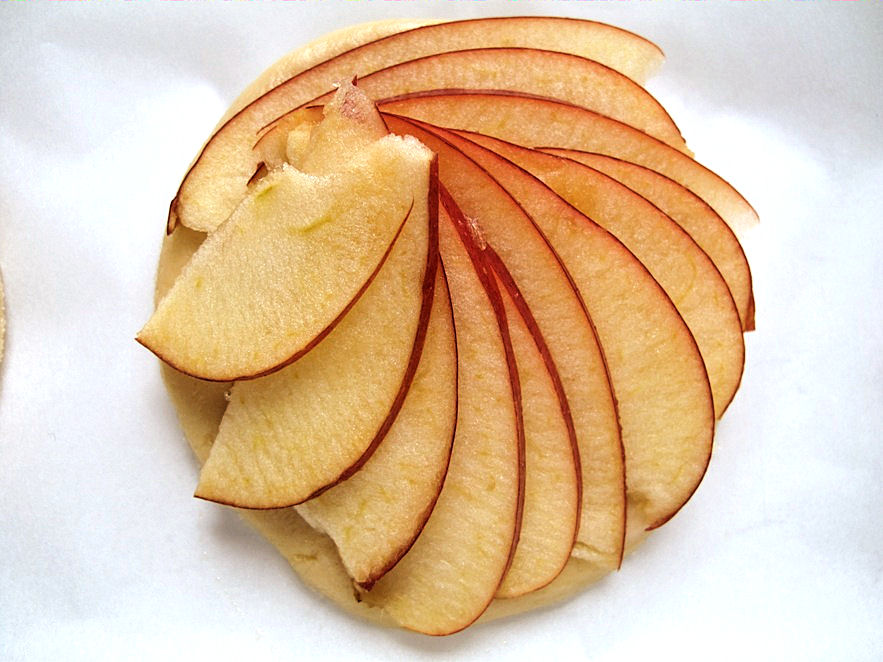
3. Cut each apple into quarters and remove seeds and core. Slice each quarter very thinly using a mandoline. 4. Arrange these slices in a round, fan pattern on top of the biscuit. Sprinkle a dash of cinnamon sugar over the top of each tart and bake for about 20-25 minutes until the edge of the biscuits start to turn golden brown.
5. Remove from oven and place a dab of butter on top of the apples. Let it melt fully into the tart before serving.


Sunday, February 20, 2011

International Incident Party: Healthy Breakfast Sundae


The theme for this month's IIP is Sundae. I looooove ice cream and desserts to my own detriment because this sweet addiction often translates into an annoying but rather endearing "muffin-top".While doing some *cough* research on this theme, I came across a sundae served in a hot dog bun and while I thought it was an interesting concept, I'm not sure if I'd be tempted to eat that sundae, even while holidaying in Thailand.  It's like combining last month's theme (Hot Dog) with this one's! Totally absurd.

I decided to go in a different direction, creating my own twist on the old ice cream sundae. Prepare to set aside any guilt, for you can eat my sundae for breakfast. Now ice cream for breakfast isn't as crazy as it sounds when you think about the amount of sugar-soaked calories in a typical stack of pancakes, smeared jams on toast and a bowl of processed cereal. And when you consider that this ice cream is eggless (sadly, not cream-less) and machiavellianly made with oatmeal, the whole concept starts to feel vaguely *winks* healthy.

The other twist is that instead of serving the ice cream in scoops as per usual in a sundae, these frozen babies were shaped into cones. Upside-down cones, yes sure, but conically-shaped nonetheless to pay homage to the most popular way of eating ice-cream (a.k.a. in a waffle cone).


So that’s the ice cream part sorted out, but where’s the actual Sundae, you ask? I started to grapple with the idea of a healthy dessert that can actually be eaten for breakfast without any guilt. Well, not much guilt, I should say. After a bit of umm-aahhing, I decided to serve the breakfast sundae in the following ways:

1. Oatmeal Ice Cream Sundae with Chocolate Roti Jala, topped with Honey-Passion Fruit Sauce, and...

2. Oatmeal Ice Cream Sundae with Apple Waffle, topped with Blueberry Yoghurt
and Toasted Almonds.

Roti jala or “net bread” are lacy, net-like pancakes or crepes (they’re very thin) that are popular in Malaysia and around this region in general. They are created using a special deep ladle with several syringe-like holes at the bottom where the runny batter can flow through into the hot pan. Normally, they would be served as a savory item alongside a meat or curry dish, and they would be yellow in color due to the turmeric powder used. However, here I decided to make a chocolate version of roti jala. Drizzled with the honey-passion fruit sauce, they proved to be a perfect accompaniment to my oatmeal sundae. I just couldn’t photograph all my steps quickly enough before the crepes started burning, so here’s a good video to show you how it’s cooked.


The other breakfast sundae version with apple waffle wasn’t too bad either. I just don’t think I need to go into a lengthy explanation on what constitute waffles, and no, no, I didn’t make the blueberry yoghurt myself – it was store bought. Once the ice cream lost its conical shape and melted into the roti jala/waffles (it took a fair while as the oats were pretty good at holding everything together), the guilt factor of having to eat both of these breakfast sundaes in one sitting melted away as well... ;-)


Thank you Penny a.k.a. Jeroxie for being a fabulous host, as always! Do check out the other sundae creations by some of the most talented bloggers I know by clicking on their thumbnails below.

Eggless Oatmeal Ice Cream 'Cones'
(makes 3/4 L)
Ingredients:
100g brown sugar
1 tablespoon glutinous rice flour
1/4 tsp salt
200ml single cream
200ml milk
250g quickcook oatmeal

Method:
1. Place all ingredients in a saucepan and whisk to combine. Bring mixture to simmer over medium heat, stirring constantly. Cook until mixture has fully thickened, about 1-2 minutes. Let cool completely either in an ice bath or in the fridge. I put mine over the ice bath, while stirring to quicken it. Pour into ice cream machine and churn according to manufacturer’s instructions.
2. In the meantime, prepare cone moulds. Cut four 20cm x 25cm sheets of baking paper. Trim four sheets of A4 paper or aluminium foil into the same size. Lay a baking paper sheet over a sheet of regular paper or foil, bring top right corner down to the middle of the paper and roll to form a cone shape. Secure with a sticky tape. Repeat with the other papers and place each cone in 4 tall slim glasses or containers.
3. Scoop the soft ice cream mixture into the paper cones, packing down ice cream tightly and leveling the top. Transfer to the freezer for at least 6 hours or overnight. To serve, remove tape and unwrap paper. Invert cones onto serving plates.

Chocolate Roti Jala
Makes 4 net pancakes
Ingredients:
1 cup of all-purpose flour
2 tablespoons Dutch-processed cocoa powder
2 tablespoons cinnamon sugar
1 1/4 cup of milk
1 tablespoon butter, melted

Method:
1. Mix all the above ingredients thoroughly. There should not be any lumps. You can either pass the batter through a sieve or blend the mixture in a blender to get a smooth mixture.
2. Heat a non-stick pan and brush lightly with some melted butter. Fill 1/4 of the roti jala mold with the mix and move it over the hot pan in a continuous spiral motion. Hold the mold close to the pan otherwise the mixture will form into droplets rather than continuous strings of batter. (If the batter is too thick or does not flow well, add 1 tablespoon of vegetable oil to the batter).
3. It cooks very fast, about a minute so make sure you keep your eye on the pancake. Lift the edges and fold the pancake into half, then into half again to make a wedge/triangular shape.

Apple Waffles
Makes: 4
Ingredients:
1 ½ cups all-purpose flour
1 teaspoon caster sugar
1 tablespoon baking powder
1 large apple, peeled, cored and finely chopped
¼ teaspoon ground cinnamon
¼ teaspoon salt
2 large eggs
1 cup milk
¼ teaspoon butter, melted

Method:
1. Preheat a waffle iron and oil as required.
2. In a bowl, whisk together the flour, sugar, baking powder, apple, cinnamon and salt with a fork. In another bowl, beat the eggs with an electric mixer on medium speed until foamy. Combine the two mixtures, blending until the dry ingredients are well moistened and the batter is smooth.
3. Pour ½ cup of the batter onto the waffle iron and bake according to the manufacturer’s instructions. Remove waffle from the iron and continue until all the batter is used.

Honey-Passion Fruit Sauce
Ingredients:
1/2 cup honey
1 passion fruit

Scoop the passionfruit contents and mix into the honey. Use as a topping by spooning onto ice-cream and pancakes.

Two ways with the Healthy Breakfast Sundae:
1. Make the roti jala, place oatmeal icecream on top or side of it and drizzle generously with the honey-passion fruit sauce. Serve immediately.
2. Make the apple waffle, place oatmeal icecream on top and drizzle with blueberry yoghurt. Sprinkle with some toasted almonds. Serve immediately.


Saturday, January 22, 2011

Spelt Apple Pie Cake


When it came to discovering the intricacies of the opposite sex, I was definitely a late bloomer. It wasn't until I was out of my teens (20, in fact) when I had my first romantic liaison. He was my first take-home beau (to meet the parents, that is) and he was French. Boy, was I glad I waited...

We met at University and during some semester breaks, we would drive across the English Channel to spend some time at his family's home in the French countryside. The days were idyllic and amongst other things, I learnt how to pick grapes from the vineyard, and plums, cherries, apples from the orchard. Those were my first farm-to-table experiences but being a young lass, I had little appreciation of what that really meant.

The first time we went apple-picking, we'd spread a canvas blanket at the base of the tree before he climbed up the apple tree and shook a fruit-laden branch. To my amazement, a number of red apples came showering effortlessly down to the ground, every one of them missing my head like a miraculous spectacle. 


Of course, in a commercial orchard this tree-shaking business wouldn't have been allowed because the fallen apples would have been  heavily bruised and unsuitable for sale. Well, I didn't know any better in those days, and as we laid back against the canvas munching our crisp, red apples, I marvelled at how unglossy (unwaxed) they were and how authentically sweet they tasted. Needless to say, those times brought me so much joy.

His grandmother was kind enough to teach me how to bake those freshly-picked fruits into the most wonderful tarts and cakes. In the process, she also taught me how to light up her antique Aga oven and control its temperature, something I'd never done before and never again since. All this while we communicated in what can be best described as sign language because my French, like my kitchen skills, was totally atrocious.


The memories of those carefree, younger days spent in France have inspired me to try out this foolproof recipe. You can't go wrong with an apple cake really, and this one is so easy you may be able to do it blindfolded with one hand tied behind your back. But why make life harder for yourself?

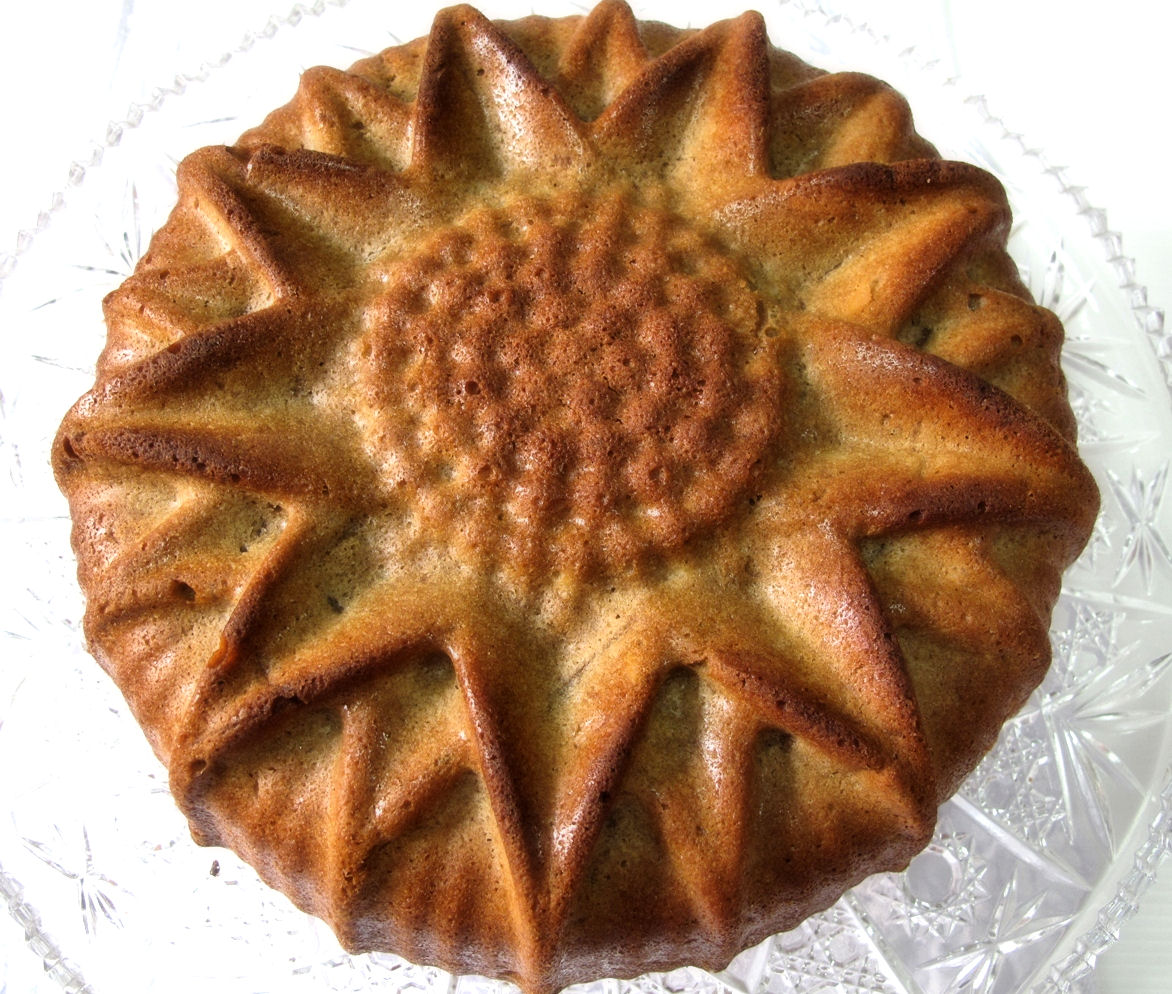
I called it the apple pie cake because while it uses a cake batter, the apples are stacked up neatly inside the the way you'd do it if it was in an apple pie. The recipe is an adaptation of Dorie Greenspan's Marie-Hélène’s Apple Cake, except that I used spelt flour instead of all purpose, and olive oil instead of butter (and I've adjusted the measurements too).

The cake is incredibly soft and moist, almost pudding-like and on the brink of fragility because the scant batter held up the apples just so. The spelt and olive oil may have something to do with this tenderest of textures, but the densely stacked up apple slices sure did their bit too. It's lovely eaten fresh, but taste even better the next day. Definitely a go-to cake - both to bake and eat - after a long day when nothing seems to go as planned!


Spelt Apple Pie Cake
Ingredients:
1½ cups spelt flour
1 teaspoon baking powder
Pinch of salt
4 large apples (if you can, choose 4 different kinds)
3 large eggs
1 cup sugar
1 teaspoon pure vanilla extract
10 tablespoons virgin olive oil
Icing sugar, to dust

Method:
1.Center a rack in the oven and preheat the oven to 175C/350F. Butter an 8-inch springform pan and put it on a baking sheet (I used a silicone flower mold that was easy to remove).
2. Whisk the flour, baking powder, and salt together in small bowl.
3. Peel the apples and remove the cores. Slice the apples sideways into ½ cm thick round slices, with a hole in the middle where the core used to be.
4. In a medium bowl, beat the eggs with a whisk until they’re foamy. Add in the sugar and vanilla and whisk for a minute or so to blend. Whisk in half the flour and when it is incorporated, add half the olive oil, followed by the rest of the flour and the remaining olive oil, mixing gently after each addition so that you have a smooth, rather thick batter. Spoon a layer of the batter into the base of the pan, then arrange a layer of apples on top. Repeat until you run out of batter and apples (the batter layers will have to be thin as there isn’t much of it), end with batter layer. Press down gently on the apples with the spatula so that the top layer is fairly even.
5. Bake for 50 to 60 minutes, or until the top of the cake is golden brown and a knife inserted deep into the center comes out clean; the cake may pull away from the sides of the pan. Transfer to a cooling rack and let rest for 5 minutes.
6. Carefully run a blunt knife around the edges of the cake and remove the sides of the springform pan. (Open the springform slowly, and before it’s fully opened, make sure there aren’t any apples stuck to it.) Allow the cake to cool until it is just slightly warm or at room temperature. If you want to remove the cake from the bottom of the springform pan, wait until the cake is almost cooled, then run a long spatula between the cake and the pan, cover the top of the cake with a piece of parchment or wax paper, and invert it onto a rack. Carefully remove the bottom of the pan and turn the cake over onto a serving dish. Once completely cooled, dust icing sugar on top. The cake can be served warm or at room temperature and actually tastes better the next day.

Thursday, September 30, 2010

Poetry Thursday #5 and German Apple Cake

Poetry Thursday #5
I went out to the hazel wood,
Because a fire was in my head,
And cut and peeled a hazel wand,
And hooked a berry to a thread;
And when white moths were on the wing,
And moth-like stars were flickering out,
I dropped the berry in a stream
And caught a little silver trout.

When I had laid it on the floor
I went to blow the fire aflame,
But something rustled on the floor,
And some one called me by my name:
It had become a glimmering girl
With apple blossom in her hair
Who called me by my name and ran
And faded through the brightening air.

Though I am old with wandering
Through hollow lands and hilly lands,
I will find out where she has gone,
And kiss her lips and take her hands;
And walk among long dappled grass,
And pluck till time and times are done
The silver apples of the moon,
The golden apples of the sun.
The Song of Wandering Aengus by W.B Yeats
 

An apple a day, sends the voters my way keeps the doctor away.

Okay, first up, I am NOT a doctor. Which is probably why you're here. Or maybe you're here to vote for my entry to Project Food Blog's second challenge? (I did a Botswanan dish, in case you're curious). Well, whatever the reason, here you are, and because you're patient enough to read this far down, I'm going to share with you a stupendously easy - but mighty pretty - recipe for German Apple Cake. I'd learnt how to make this when I was working and living in Germany. Oh yes, those pioneer baking days when my oven-watching skills were nought. ;-) I still bake this cake to remind me of how far I've come since then.


If you wish to master the art of turning Snow White's poisoned gift into something that any repressed pastry chef would be proud of, listen carefully - or perhaps that should be, read carefully. On that day when we were overwhelmed with extra apples in the house, and I mean extra extra... an apple-invasion, if you can imagine it - I went ahead and did something to claim my territory back. I baked four apple cakes in a row. And gave them away to grateful neighbours. There, that ought to teach them frisky apples a lesson! Ah well, really it was my fault for not reminding my housemates that we hadn't yet finished our three bushels of apples and to please, not fill the house with any more.


Apple Cake Version 2.0

While you're still with me, voting for Project Food Blog ends on Thursday (Sept 30) and if you can look past this shameless plug and vote for me to advance to the next round, then I will be only too happy to share this so-easy-it's-truly-embarrassing recipe with you. I guarantee this apple cake is not only stunning-looking, it's also stomach-warmingly delicious. Enough to send any jealous stepmother to the nuthouse and the seven dwarfs to the unemployment line. Enjoy!

German Apple Cake
Ingredients:
125g butter
125g sugar
2 teaspoons vanilla extract
1 tablespoon lemon juice (optional)
pinch of salt
3 eggs
200g all-purpose flour
2 teaspoon baking powder
1-2 tablespoons milk

Topping:
750g apples, peeled, cored and sliced
25g melted butter
40g sultanas/raisins (optional)
2 tablespoons apricot jam
1 tablespoon water

Method:
1. Whisk sugar, butter, vanilla until light and fluffy, then mix in the lemon juice and salt.
2. Add eggs one at a time, beating on medium speed to incorporate eggs into the batter.
3. In a separate bowl, sift together the flour and bking powder and gradually add them and the milk to the batter above, mixing slowly until smooth. Use only as much milk as is necessary to give the mixture a slow-dropping consistency.
4. Pour into an 11-inch greased springform tin and level off surface with a spatula.
5. Quarter the peeled, cored apples (or cut them into 1/8ths if they are large). Make a few parallel cuts on the apples (skin-side) and arrange in a flower shape on top of the batter. (As you can probably see, I started doing the parallel cuts on two apple slices, then gave up. I had 4 cakes to do(!), and honestly, it didn't make any difference to the final taste of the cake). Press the apples into the batter very lightly. Arrange the sultanas in the same way.
6. Melt butter and brush the tops of the apples with it. Bake at 180C in a preheated oven for about 45 minutes.
7. For glazing, boil the jam with water and reduce heat, simmer until mixture becomes syrupy. Spread syrup onto the whole cake using a pastry brush as soon as it comes out of the oven. (Tip: The syrup seals the cake and minimizes the "pulling away" of the cake batter from the apples, which will leave unsightly gaps).


Tuesday, September 7, 2010

Apple-Coffee Bundt Cake with Butterscotch Glaze


My first vivid memory of munching into an apple and delighting in its sweet crunchiness was when I was 8 years old. Yes, a ripe old 8. A long time ago that was in the chronology of my life. In those days, apples were not commonly sold in Brunei. In fact, they were a bit of a luxury because not many food items were being imported into the country then.

One morning, my aunt, in her early twenties and attending nursing college at the time, had given a red apple each to my sister and I. We guarded our precious apples for a little while, eyeing each other's zealously while waiting to see who would eat theirs first so we can gloat to the other about our still intact apple. Strange, I know, the games kids play. Well, my aunt passed that same day. So suddenly, still too young. She'd suffered a brain hemorrhage right in the middle of a lecture. I remembered that, because her college mates who had come to pay their last respects that day were still wearing their trainee nurse uniforms (in my culture, funerals and burials are normally conducted on the same day of death).

Thus, the memory of that red apple remained with me to this day, ingrained in my mind as the last treasure my aunt had given us. As I said, apples were very rare in those days, they weren't cheap and my aunt was only a student. So it was really through an act of love that we had come to be in posession of them that day.


Now of course, apples abound everywhere and are available all year round, imported from corners of the world that cultivate them. In fact, we had so many Fuji and Gala apples in the house recently (a miscalculated shopping error) that we couldn't finish them fast enough. A number were already starting to lose their firmness and lustrous color, and it really made me sad at the thought of having to discard them. As I was perusing through some old cookbooks I'd acquired from Germany (in German), I came across many recipes using apples. As if it was a sign.  


Somehow, I ended up spending the whole afternoon baking 4 apple cakes, one after the other (my oven space is limited, ok). Three went to the next door neighbors as baked gifts. One, I kept for ourselves. The Apple-Coffee Bundt Cake is wonderfully moist and dense with a little bit of crunch from the almonds. The coffee flavor dominated and paired wonderfully with the creaminess of the butterscotch glaze. The grated apples provided the moisture, and its tartness is enhanced by the lime zest. In fact, if my fun and kindhearted aunt was still around today, I think she'd like this cake very, very much. This recipe and post is therefore dedicated to her memory. 

Apple-Coffee Bundt Cake with Butterscotch Glaze
Ingredients:
Cake:
1 ½ cups sugar
3/4 cup butter
4 eggs, separated
2 tablespoon instant coffee
1 cup hot water
1 tsp vanilla extract
3 cups flour
1 tsp baking powder
1/2 tsp cinnamon
1/2 tsp salt
zest of 1 lime
2 apples, peeled, cored and grated
1/2 cup almonds, chopped finely

Butterscotch Glaze:
125g butter
½ cup firmly packed soft brown sugar, sifted
2 tablespoons golden syrup
½ cup cream
1 teaspoon vanilla extract

Method:
1. Preheat oven to 180C/350F. Generously butter a 10-inch Bundt pan, then dust with flour, tapping to remove excess.
2. Dissolve the coffee in a cup of hot water, and leave to cool.
3. In a large mixing bowl, cream together butter and sugar until light and airy. Add in the egg yolks, one at a time, beating well after each addition. Stir in cooled, strong coffee and vanilla extract, mixing until smooth.
4. In a separate bowl, sift together the flour, baking powder, cinnamon, lime zest and salt. Add to the wet ingredients, and stir until the mixture just comes together. Fold in the apples and almonds.
5. In a third bowl, use a mixer to beat the egg whites into stiff peaks. Using a spatula, gently fold the whites into the batter until just barely blended, working carefully so as not to deflate the mixture.
6. Scrape the mixture into the prepared Bundt pan, smoothing the top with a spatula. Bake in preheated oven for 60-75 minutes, or until the cake springs back to the touch and a skewer inserted into the middle comes out clean.
7. Let cool in the pan for 10 minutes before gently turning out onto a rack to cool completely.
8. While the cake is cooling, prepare the glaze. Stir the butter and sugar in a pan over low heat until butter melts and sugar dissolves
9. Add the golden syrup and cream to pan, reduce the heat; simmer for 10 minutes or until sauce has slightly thickened. Remove from heat and add the vanilla. Sauce will thicken as it cools. Set aside.
10. Once the cake is cooled to room temperature, place it on a serving plate and slowly pour the butterscotch glaze over the top, letting some run down the sides of the cake. Either serve immediately, or for a moister than moist cake, leave the glaze to soak into the cake before serving.

Tuesday, June 15, 2010

Jammin' in my Kitchen

This morning, I put an end to all our excess fruits (for today) before they all turn south and rot. What a waste and crime that would be, hey? So I tried to extend their shelf life a bit longer and performed some sort of kitchen magic on them, a bit like me trying to extend my youth a little by visiting a beautician to undergo various extraordinary skin-lifting facials now and then. Haha... well, we try what we can, don't we?

Ok, back to the kitchen. The extra apples and mangoes have now all been turned into jams and stored in jars in my fridge. The cooking process was not without some pain, especially when bits of  boiling hot jam spurted out of the pot and onto my arms.... ouch! Plus, the slow-cooking process took so L-O-N-G, I think I actually fell asleep in the middle of all that stirring. Yes, making jam is real boring, in case you want to try it someday.

Take one last look at these because they will all be turned into mush soon..

I thought this was a lovely shot of the jams, until I realised that the fruits on top were the wrong way round!

 
Ok, this is correct. Apple jam on left, mango jam on right.

Yummy, I can't wait to have these on my toast for brekkie tomorrow!

Sunday, June 13, 2010

Apple of my eye

Someone was saying this morning that we had an apple overload in the house and would I please do something about it? Funny thing is, she's the main grocery shopper around here, so I'm really not sure how we ended up with as many apples as the number of residents in my neighborhood!

Anyway, to cut a short story even shorter, I decided it's been a while since we had our yummilish German apple cake. It's so easy to make and I wonder why I don't make this more often....


I used a mix of Granny Smiths and Golden Delicious

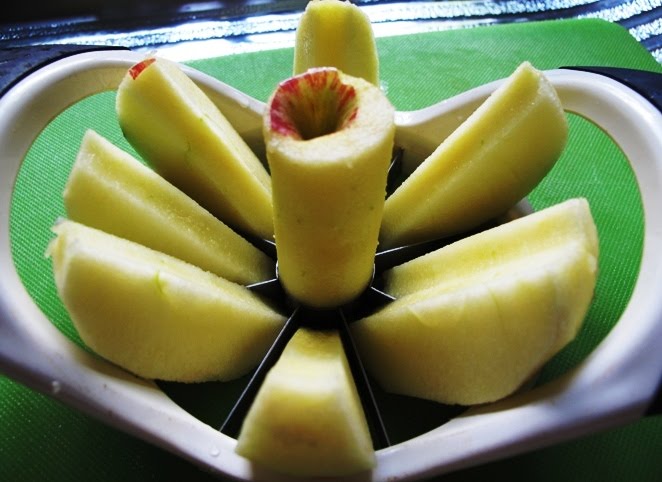
I LOVE my apple corer!! It just makes my Diva life so much more easier.


The aftermath of the Apple Massacre!


This is how it ended up in the pan. Granny Smiths sandwiched between the Golden Deliciouses. (hmm... that sounds so wrong! hahaha..)


A pinch of cinnamon and it's ready to pop into the oven.

The cooked cake. Yumms....can you smell the cinnamon?

I suppose a tiny slice with a blob of vanilla icecream and raspberry never hurt anyone...hehe.
Related Posts with Thumbnails