Foodiva's Kitchen: oats
Showing posts with label oats. Show all posts

Saturday, October 29, 2011

5-Star Makeover - Spicy Quiche with Easy Oats Crust and Bilimbi

Its only intangible ideas, concepts, beliefs, fantasies that last. Stone crumbles. Wood rots. People, well, they die. But things as fragile as a thought, a dream, a legend, they can go on and on. If you can change the way people think. The way they see themselves. The way they see the world. You can change the way people live their lives. That's the only lasting thing you can create.
~ Chuck Palahniuk

I'm very disorganized this month that I'm late for the 5-Star Makeover Challenge hosted by Natasha of 5 Star Foodie and Lazaro, of Lazaro Cooks!. Our challenge was to take tailgate party food and turn it deliciously gourmet.


The only problem was, I had never tailgated before so I had no idea what people ate at these sorts of parties. A few turns at Google later, I gathered that tailgating involved a lot of grilling (preferably meat) and consuming plenty of ahem, beverages. Basically it's a social event that often takes place at stadium or arena parking lots before major team sports matches or even concerts. Something that almost never happens in Asia, I imagine. Or maybe I was never invited to one :-(.

Don't get me wrong. We do barbeques at home very well -  for new years, birthdays, to celebrate achievements and so on. So for this tailgate party, I'm thinking of the same food that we would prepare and eat for our own version of tailgating a.k.a. barbeque parties here, and what better to make than quiche? Admittedly, it's hard to think of quiche and gourmet in the same frame of mind but I made this an appetizer-styled quiche so I'm hoping that makes it more gourmet-ish.   


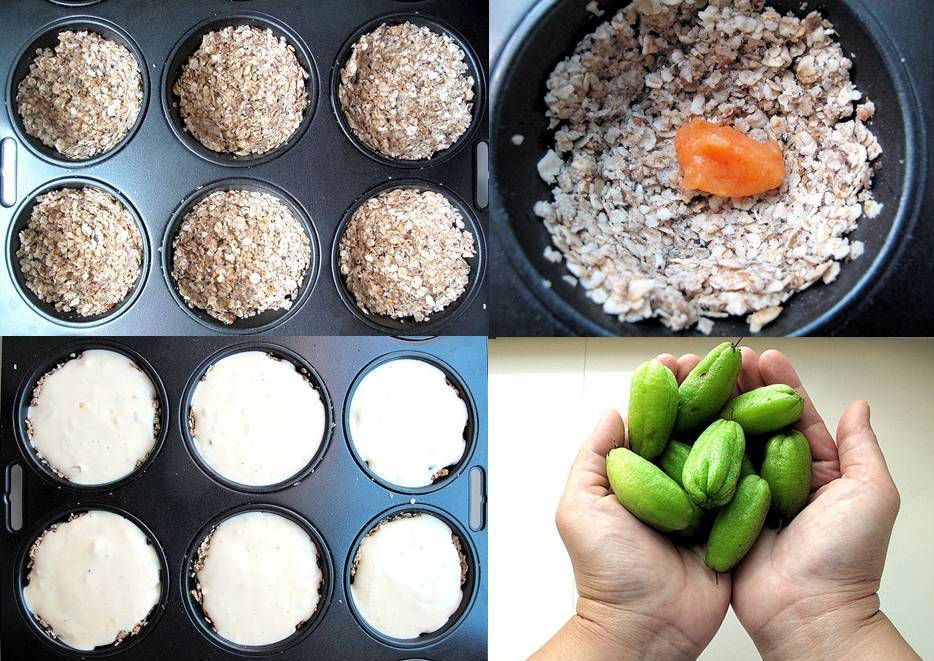
By the time I finished assembling this dish, it looked more appropriate for a bridal shower than for a tailgating party. The flower-like bilimbi I used as a topping probably had a lot to do with it, but those actually had a specific purpose. You see, while the quiche looked quite delicate on the outside, I really packed it with spices on the inside. I used my favorite oats crust infused with crushed Nigella seeds, cumin and coriander and at the base of the crust, I sneaked in a (small) dollop of my homemade hot sauce. A really hot sauce made out of Scotch Bonnets, Thai chillies and apple! You will feel the punchy heat - and all your pores opening - soon after the second bite, promise. What fun is a tailgating party if you can't sweat a little, right?

Oh, the extremely acidic bilimbi works to offset the heat, so they're not just there to look pretty!

Do head over here to view the round-up of this Makeover Challenge.


Spicy Quiche with Easy Oats Crust and Bilimbi
Makes: 6 muffin-sized quiches
Crust
1 teaspoon Nigella seeds
1 teaspoon cumin seeds
1teaspoon coriander seeds
1 cup organic rolled oats
2 tablespoons whole wheat flour
3 tablespoons grapeseed oil
2 tablespoons water
1/2 teaspoon salt
1/2 teaspoon pepper

Filling
3-4 teaspoons extra hot sauce (I used this Scotch-Bonnet and Thai chilli one)
1 cup heavy cream
1 egg
1/3 cup grated Dutch-aged Gouda cheese
2 garlic cloves, minced
1 small red onion, finely chopped
Salt and pepper, to taste
3 bilimbis, sliced

Method:
1. Preheat oven to 180C/350F. Dry roast Nigella, cumin and coriander seeds in a pan over medium heat until fragrant - about 1-2 minutes. Remove from heat and grind coarsely using a mortar and pestle or in a grinder.
2. Put ground spices in a bowl and add oats, flour, grapeseed oil, salt and pepper and mix until the oil is absorbed evenly into the oats. Add water and stir evenly until the mixture becomes sticky when you pinch a little between your fingertips.
3. Brush 6 muffin cups lightly with grapeseed oil. Scoop about two tablespoons of the spiced oats mixture into each muffin cup. With your fingertips, press the mixture into the base and sides of the cup. The edges won't be even, so don't worry about it. Bake for 10 minutes.
3. In the meantime, make the filling. Simply mix all the ingredients in a bowl and stil until well combined.
4. Remove the oats crusts and pour in the filling mixture into each crust until very near the top (I used 1/3 cup). Bake at 180C/350F for 20 minutes or until filling just starts to set on top.
5. Remove the muffin cups from the oven and leave to cool for at least 10 minutes. Before turning out, run a knife around the crust to release any bits sticking to the cup. Tip the muffin tray onto another tray and transfer upright to a serving platter. If not served immediately, store in an airtight container in the fridge for up to 3 days.

Sunday, February 20, 2011

International Incident Party: Healthy Breakfast Sundae


The theme for this month's IIP is Sundae. I looooove ice cream and desserts to my own detriment because this sweet addiction often translates into an annoying but rather endearing "muffin-top".While doing some *cough* research on this theme, I came across a sundae served in a hot dog bun and while I thought it was an interesting concept, I'm not sure if I'd be tempted to eat that sundae, even while holidaying in Thailand.  It's like combining last month's theme (Hot Dog) with this one's! Totally absurd.

I decided to go in a different direction, creating my own twist on the old ice cream sundae. Prepare to set aside any guilt, for you can eat my sundae for breakfast. Now ice cream for breakfast isn't as crazy as it sounds when you think about the amount of sugar-soaked calories in a typical stack of pancakes, smeared jams on toast and a bowl of processed cereal. And when you consider that this ice cream is eggless (sadly, not cream-less) and machiavellianly made with oatmeal, the whole concept starts to feel vaguely *winks* healthy.

The other twist is that instead of serving the ice cream in scoops as per usual in a sundae, these frozen babies were shaped into cones. Upside-down cones, yes sure, but conically-shaped nonetheless to pay homage to the most popular way of eating ice-cream (a.k.a. in a waffle cone).


So that’s the ice cream part sorted out, but where’s the actual Sundae, you ask? I started to grapple with the idea of a healthy dessert that can actually be eaten for breakfast without any guilt. Well, not much guilt, I should say. After a bit of umm-aahhing, I decided to serve the breakfast sundae in the following ways:

1. Oatmeal Ice Cream Sundae with Chocolate Roti Jala, topped with Honey-Passion Fruit Sauce, and...

2. Oatmeal Ice Cream Sundae with Apple Waffle, topped with Blueberry Yoghurt
and Toasted Almonds.

Roti jala or “net bread” are lacy, net-like pancakes or crepes (they’re very thin) that are popular in Malaysia and around this region in general. They are created using a special deep ladle with several syringe-like holes at the bottom where the runny batter can flow through into the hot pan. Normally, they would be served as a savory item alongside a meat or curry dish, and they would be yellow in color due to the turmeric powder used. However, here I decided to make a chocolate version of roti jala. Drizzled with the honey-passion fruit sauce, they proved to be a perfect accompaniment to my oatmeal sundae. I just couldn’t photograph all my steps quickly enough before the crepes started burning, so here’s a good video to show you how it’s cooked.


The other breakfast sundae version with apple waffle wasn’t too bad either. I just don’t think I need to go into a lengthy explanation on what constitute waffles, and no, no, I didn’t make the blueberry yoghurt myself – it was store bought. Once the ice cream lost its conical shape and melted into the roti jala/waffles (it took a fair while as the oats were pretty good at holding everything together), the guilt factor of having to eat both of these breakfast sundaes in one sitting melted away as well... ;-)


Thank you Penny a.k.a. Jeroxie for being a fabulous host, as always! Do check out the other sundae creations by some of the most talented bloggers I know by clicking on their thumbnails below.

Eggless Oatmeal Ice Cream 'Cones'
(makes 3/4 L)
Ingredients:
100g brown sugar
1 tablespoon glutinous rice flour
1/4 tsp salt
200ml single cream
200ml milk
250g quickcook oatmeal

Method:
1. Place all ingredients in a saucepan and whisk to combine. Bring mixture to simmer over medium heat, stirring constantly. Cook until mixture has fully thickened, about 1-2 minutes. Let cool completely either in an ice bath or in the fridge. I put mine over the ice bath, while stirring to quicken it. Pour into ice cream machine and churn according to manufacturer’s instructions.
2. In the meantime, prepare cone moulds. Cut four 20cm x 25cm sheets of baking paper. Trim four sheets of A4 paper or aluminium foil into the same size. Lay a baking paper sheet over a sheet of regular paper or foil, bring top right corner down to the middle of the paper and roll to form a cone shape. Secure with a sticky tape. Repeat with the other papers and place each cone in 4 tall slim glasses or containers.
3. Scoop the soft ice cream mixture into the paper cones, packing down ice cream tightly and leveling the top. Transfer to the freezer for at least 6 hours or overnight. To serve, remove tape and unwrap paper. Invert cones onto serving plates.

Chocolate Roti Jala
Makes 4 net pancakes
Ingredients:
1 cup of all-purpose flour
2 tablespoons Dutch-processed cocoa powder
2 tablespoons cinnamon sugar
1 1/4 cup of milk
1 tablespoon butter, melted

Method:
1. Mix all the above ingredients thoroughly. There should not be any lumps. You can either pass the batter through a sieve or blend the mixture in a blender to get a smooth mixture.
2. Heat a non-stick pan and brush lightly with some melted butter. Fill 1/4 of the roti jala mold with the mix and move it over the hot pan in a continuous spiral motion. Hold the mold close to the pan otherwise the mixture will form into droplets rather than continuous strings of batter. (If the batter is too thick or does not flow well, add 1 tablespoon of vegetable oil to the batter).
3. It cooks very fast, about a minute so make sure you keep your eye on the pancake. Lift the edges and fold the pancake into half, then into half again to make a wedge/triangular shape.

Apple Waffles
Makes: 4
Ingredients:
1 ½ cups all-purpose flour
1 teaspoon caster sugar
1 tablespoon baking powder
1 large apple, peeled, cored and finely chopped
¼ teaspoon ground cinnamon
¼ teaspoon salt
2 large eggs
1 cup milk
¼ teaspoon butter, melted

Method:
1. Preheat a waffle iron and oil as required.
2. In a bowl, whisk together the flour, sugar, baking powder, apple, cinnamon and salt with a fork. In another bowl, beat the eggs with an electric mixer on medium speed until foamy. Combine the two mixtures, blending until the dry ingredients are well moistened and the batter is smooth.
3. Pour ½ cup of the batter onto the waffle iron and bake according to the manufacturer’s instructions. Remove waffle from the iron and continue until all the batter is used.

Honey-Passion Fruit Sauce
Ingredients:
1/2 cup honey
1 passion fruit

Scoop the passionfruit contents and mix into the honey. Use as a topping by spooning onto ice-cream and pancakes.

Two ways with the Healthy Breakfast Sundae:
1. Make the roti jala, place oatmeal icecream on top or side of it and drizzle generously with the honey-passion fruit sauce. Serve immediately.
2. Make the apple waffle, place oatmeal icecream on top and drizzle with blueberry yoghurt. Sprinkle with some toasted almonds. Serve immediately.


Wednesday, August 25, 2010

Diet-Buster Chocolate Oats Bar


If you're on a diet, or under the illusion that you are (what the heck are you doing here then?), then look away. Click on one of my other healthier posts, because this one is going to ruin your regimented eating, or you - whichever comes first.

However, if you're a balanced eater, or an A-list superstar with a personal trainer as lenient as Jillian Michaels, then stay. Enjoy the pictures, at least, even if you don't ever get to make (or eat) these decadent bars. Now, let me warn you that aside from the oats and um, tomatoes, every ingredient in this recipe spells D-A-N-G-E-R. That reads as "happiness", by the way. *grins*


OMG-icious!

Wouldn't you be happy if you had peanut butter, chocolate, condensed milk and yes, healthy oats pass through your lips in one go? Don't rub your nose when you answer, because I'd be happy. Of course, I'd only have one slice of these bars, or perhaps two, then I'd be running my ass off on the treadmill/roads before I lose myself completely. And then I'd have a slice more. LOL. Come on, you only live once!


Diet-Buster Chocolate Oats Bar
Yields: 3kgs or 10lbs on the hips

Ingredients:
½ cup butter
2 cups graham cracker biscuits or Digestives, crumbed
2 cups organic rolled oats
1 can (400g) sweetened condensed milk
1 cup chopped chocolate
¾ cup peanut butter
1/3 cup dried, candied tomatoes, chopped
Sea salt, to sprinkle

Method:
1. Preheat oven to 180°C/350°F.
2. Place the biscuits in a food processor to crumb them, then put in a bowl. Melt butter in the microwave and add to the biscuit crumbs. Mix with a spoon until combined.
3. Sprinkle biscuit crumbs into the bottom of a 9 x 13-inch pan and pat down firmly with the back of a spoon to create an even surface.
4. Add oats on top of the biscuit layer, and pat down evenly as well.
5. Pour condensed milk carefully over the oats layer, and by tilting the pan gently towards the four corners of the pan, you will be able to spread the condensed milk fairly evenly.
6. Bake in the oven for 25 minutes until golden brown.
7. Before you take out the baking tin, melt the chocolate and peanut butter in a pan over low heat, stirring constantly to prevent burning. Pour this mixture over the hot base, and tilt pan as before to ensure complete coverage by the chocolate. Sprinkle chopped dried fruits (I used candied tomatoes) and a pinch of sea salt on the chocolate layer.
8. Cool completely before chilling in the fridge for easy slicing.
9. Consume with a tall, cold glass of milk, and at your own peril!


Friday, August 6, 2010

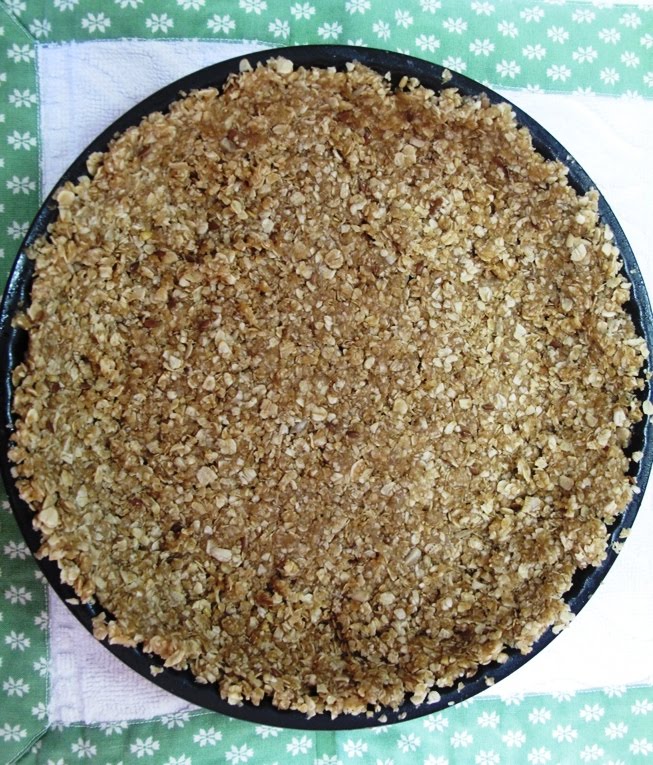
Purple Sweet Potato Pie with Easy Oats Crust


My reaction when I first took a bite out of this pie was that it had turned out better than I thought it would when I was toying with the recipe. Now, every cook or baker knows deep in their hearts that it’s not every day they will stumble upon or create a mindblowing recipe, and for me, today was one in those 1,001 days (or maybe more).

I recently came across this post by Bits of Taste featuring the purple-colored Japanese sweet potatoes, or "Okinawan" potatoes, prevalent in Japan, Hawaii and many parts of Asia. The posted pictures were so enticing that I had to run out to get some! When I was growing up, we grew these and the orange-colored sweet potatoes in our back garden and would pull them fresh out of the ground whenever we'd wanted to eat some. Unfortunately, we don’t cultivate these around my house now because adult commitments dictate that we should just go ahead and purchase these from the farmer’s market or supermarket if we ever need them. Besides, it’s my mother who has the green fingers and unfortunately, the green finger gene has not been passed down to me.


Anyway, the traditional way of eating sweet potatoes in my childhood home was to boil them or fry them in batter. Either way, we used to dip the sweet potato pieces in sweet condensed milk and sometimes the thick milk would dribble down the sides of our mouths and down to our chins (and our laps, or the floor). Such was the uninhibited joy of eating sweet potatoes in those days! Hang on a minute…. We do STILL eat them with condensed milk even now, just a little less messy and hopefully a tad more elegantly.


My eyes glazed over at the thought of these two rich ingredients trapped in a dish – sweet potato and condensed milk - they taste soooo, so good together! Could it be possible to throw them both in a pie and they will still taste heavenly? I didn’t need someone to come over and twist my arm, because that’s what I‘d planned to do when I bought the purplies. Hmm.. but the pie can’t just have any old crust though. I wanted something crunchy, something earthy (whatever that means), then it crossed my mind that maybe oats and wholemeal flour as a base would do the trick. In my excitement about the potatoes, I’d forgotten to buy eggs and found only two left in the fridge. Well, I needed those for the filling so the crust would have to go eggless. Luckily, the oats and wholemeal didn’t need eggs for stickiness, they were perfectly fine by themselves. Gosh, see how amazingly resourceful we human beings can be when pushed into a corner?

The baked sweet potato and condensed milk pie combo really surpassed my expectations (hadn’t I already told you this??). The moist, silky-smooth and tender filling complemented the crusty oats perfectly. Oh, did I say that I also added coconut milk (instead of cream) to the filling? Yes, that sealed the deal for sure! This will be the recipe I will pass down to my children someday. This, and maybe my mother’s green finger gene.


I drizzled extra condensed milk on top of mine because I wanted to feel my mamma's arms around me.. :-)


Purple Sweet Potato Pie with Easy Oats Crust
Ingredients:
I cup instant rolled oats
¼ cup wholemeal flour
3 tablespoon brown sugar
½ teaspoon cinnamon powder
5 tablespoons vegetable oil
2 tablespoons water

Filling:
1/3 cup brown sugar
2 eggs
1 teaspoon vanilla extract
¼ teaspoon salt
dash of ground nutmeg
1/2 cup condensed milk
3/4 cup coconut milk
425g (1 can) purple sweet potato, boiled and mashed

Method:
1. Lightly grease a 9-inch pie tin or spray with non-stick baking spray. Preheat the oven to 200°C.
2. In a bowl, mix the oats, flour, brown sugar and cinnamon. Work oil and water in until well blended.
3. Pat oat crust into the pie tin with your fingers and bake for 8 to 10 minutes until browned around the edges. Remove from the oven while you prepare the filling. Reduce oven temperature to 180°C.
4. For the filling, whisk the brown sugar, eggs, vanilla and salt in a bowl. Blend in the coconut milk and condensed milk, then add the mashed sweet potato. Mix further until it becomes a smooth mixture.
5. Pour the mixture into the prepared crust and bake for 30-40 minutes, until the filling is just set. A skewer inserted into the center of the pie will come out clean.
6. Remove from oven, cool for 10 minutes before turning out and serving.

Related Posts with Thumbnails