Foodiva's Kitchen: orange
Showing posts with label orange. Show all posts

Monday, September 26, 2011

Muffin Monday - Carrot Spice Muffins

I am so busy doing nothing... that the idea of doing anything - which as you know, always leads to something - cuts into the nothing and then forces me to have to drop everything.
~ Jerry Seinfeld


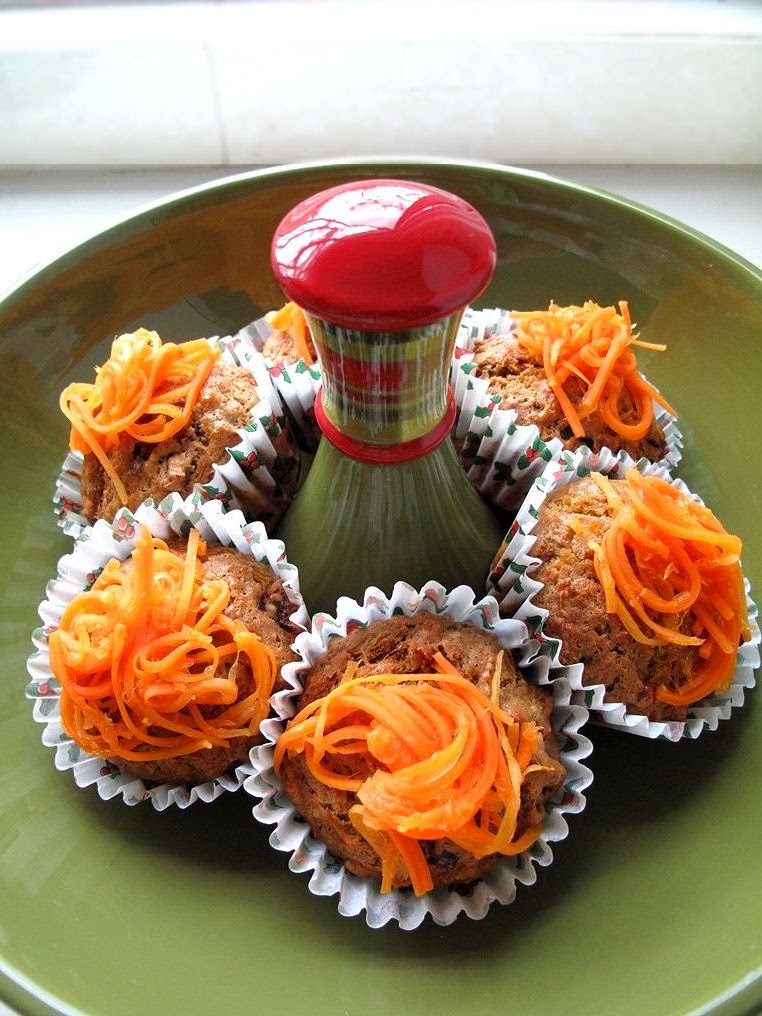
I've always had a weakness for moist carrot cake, packed to the brim with grated carrots, nuts and dried fruits and topped with the most decadent cream cheese frosting. So you can imagine how much I was looking forward to making this week's Muffin Monday recipe, Carrot Spice Muffins. Our host, Anuradha of Baker Street blog specified that this was to be a healthy muffin, so I reluctantly tossed out the evil frosting idea and ended up with a healthier topping instead.


Friday, September 23, 2011

French Fridays With Dorie - Honey Rose Spiced Madeleines and Giveaway Winner

“Don't part with your illusions. When they are gone you may still exist, but you have ceased to live.”
~ Mark Twain

Did I manage to fool you into thinking that I made madeleines this week for French Fridays? Well, the batter was for madeleine cookies for sure, but I do not own a madeleine baking pan. Although I've had these delicious, made-for-dunking cookies before, I'd never been tempted to make them until this week's recipe came along. As soon as these came out of the oven and were popped into my mouth, however, I wondered why I never tried my hand at making them for they were A+ delicious!

Monday, February 14, 2011

Tropical Valentine: Tuna Cakes with Banana Chutney and Green Curry Dip


Blue waters. Sunny, clear skies. Warm, breezy weather. Check.
Cold, tall thirst-quencher in hand. Check.
Valentine's Day. Check.
Spicy nibbles, condiments and dip. Double-check
Hot, sizzling date. Uncheck.

Okay, so today is Valentine's Day. Not a day that's normally commemorated in our household, but on this blog, nothing's truly normal. You know that saying, "Two's company, three's a crowd"? You'd think that would be an apt phrase for Valentine's when lovebirds (traditionally two people) have a good excuse to cozy up to each other. But not in this realm.

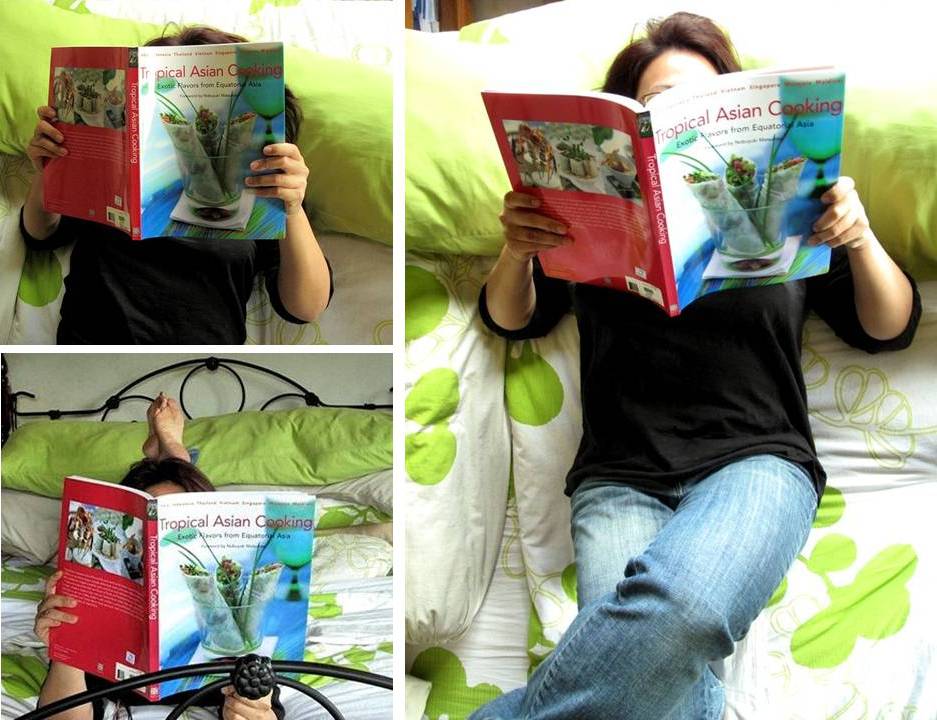
Today, three of us are paying tribute to a day reserved for love (not that everyday isn't) by each trying out a recipe from the Tropical Asian Cookbook compiled by Wendy Hutton. Our tasteful threesome is made up of Trix (Tasty Trix), Penny (Jeroxie.com) and myself, blogging out of three of the most happening spots on this planet (see below). Well, okay.... maybe two.


How did this come about? On the very last day of 2010, I held my first giveaway which was this beautiful cookbook, and the happy winner was Trix. Since we both have a copy of the same book, we thought why not cook something tropical-themed together out of it? And as we are of the "three's company, two's a bore" school-of-thought, we roped Penny in to join us! 


The book is a compilation of recipes from the prestigious Four Seasons Hotels all over Southeast Asia and South Asia. It features dishes from Singapore, Thailand, Malaysia, Indonesia, Vietnam, Maldives and India. My tuna cake with its simple homemade paratha-like pastry and chutney is reminiscent of a South Asian/Indian dish, while its green curry dip is distinctly Thai. I chose this tropical noon nibbles because I admit, it was the visual that first drew me in. The way the chef (and I presume, the food stylist) presented the dish in the book was stunning... my pictures here don't even come close.

Then I got to studying the recipe and went "Oh my gawd!". No, it wasn't too complex to make, it just seemed that the list of ingredients went on and on and on... On the bright side, everything listed there was easily accessible to me (and you too, I imagine). And so quickly running out of excuses, I decided to forge ahead and make this. Let me tell you, regret it I did not, for the flavors of the tuna cakes when combined with the kick-ass spiciness of the green curry and the sweet heat of the banana chutney were out of this world! Imagine a fireworks display taking place in your mouth, it's not the heat you're concentrating on but the beauty of the explosions.

Tuna cake ingredients

I shall not say too much more but leave you to lovingly stare at all the ingredients. My kitchen was turned upside down for an afternoon making these, but the thought of lovingly handfeeding these tuna cakes to some  (mythical, hot) loved one overrode all painful thoughts of cleaning up. In the end, it was my nephew who scoffed about six of these tuna cakes in one sitting. He declared them "really yummy",  so I guess I can officially elect him my Valentine this year.

Banana chutney ingredients, using curry leaves and bananas from my garden.

Green curry dip ingredients.
I somehow forgot to take a shot of the cilantro and mint - the two major green contributors!
Chilies galore!

Trix has made the spinach kofta with eggplant puree, a delight for vegetarians, while Penny made a lovely thirst-quencher, rose flavored lassi with pistachios to wash all the tropical flavors down. For a complete picture of our Valentine's Day meal inspired by the tropics, remember to head over to their blogs and check out their posts too!

Tuna Cakes with Banana Chutney and Green Curry Dip
Makes 8
Ingredients:
Pastry
1 cup flour
Pinch of salt
1/3 cup water
1 tablespoon vegetable oil

Tuna Filling
2/3 cup (100g) firmly packed drained canned tuna
2 tablespoons very finely chopped onion
2 tablespoons very finely chopped cilantro (coriander) leaves
2 tablespoons freshly grated or moistened desiccated coconut
2 teaspoons lime juice
Salt to taste

Banana Chutney
2 teaspoons vegetable oil
1 teaspoons mustard seeds (I used Nigella seeds)
10 curry leaves
2 dried red chilies, soaked in water 5 minutes, roughly chopped
2 medium ripe but firm bananas, roughly mashed
6 tablespoons fresh orange juice
1 teaspoon turmeric powder (optional)
Salt and black pepper to taste

Green Curry Dip
4 teaspoons finely chopped ginger
4 teaspoons finely chopped garlic
1 large green chili, chopped
1 cup coarsely chopped fresh cilantro (coriander) leaves and fine stems
1 cup coarsely chopped fresh mint leaves
2 tablespoons coconut or vegetable oil
1 teaspoon brown mustard seeds
1 teaspoon cumin seeds
1 large onion, chopped
10 curry leaves
1 large tomato, peeled and chopped
2 teaspoons curry powder
3/4 cup coconut milk
1/2 teaspoon salt

Method:
1. Prepare the tuna filling by combining all ingredients in a bowl, mixing well. Set aside.
2. Combine flour, salt and water in a bowl. Knead for 5 minutes to make a pliable dough. Divide into 8 balls, then flatten each with the palm of your hand. Press with the thumbs and fingers to make each ball into a circle about 3 1/4 in (8cm) in diameter. Fill each circle with one-eighth of the tuna, then lift up the sides, pleating and squeezing them to the centre to enclose the filling. Flatten gently into a cake about 2-in (5cm) in diameter , then heat 1 tablespoon oil on a large skillet and sear the tuna cakes until golden brown, about 1 ½ minutes on each side. Transfer tuna cakes to a baking tray and bake in an oven at 350F (180C) for 8 minutes.
3. To prepare the banana chutney, heat oil in a small pan and add mustard seeds, curry leaves, and dried chilies. Stir-fry until the seeds crackle, then add the banana and mix well with a wooden spoon, cooking for 1 minute. Stir in the orange juice and turmeric, and season with salt and pepper, then transfer to a bowl. Cool, then chill in the refrigerator.
4. For the green curry dip, process Ginger, garlic, chili, cilantro and mint leaves together to make a smooth paste. Heat the oil in a pan and add mustard and cumin seeds. Stir-fry over medium heat until they crackle, then add onion and curry leaves. Stir-fry until the onion softens, 3-4 minutes, then add tomato and cook 5 minutes.
5. Add the blended paste and cook, stirring frequently, 4-5 minutes. Pour in coconut milk, add salt and bring slowly to a boil, stirring. Simmer uncovered until the sauce thickens, about 8 minutes. Taste and add more salt if desired.
6. Serve the tuna cakes with banana chutney and green curry dip.

Thursday, December 30, 2010

Orange-Lavender Cupcakes and A Teaser

To live content with small means, to seek elegance rather than luxury, and refinement rather than fashion, to be worthy, not respectable, and wealthy, not rich, to study hard, think quietly, talk gently, act frankly, to listen to stars and birds, to babes and sages, with open heart, to bear all cheerfully, do all bravely, await occasions, hurry never, in a word to let the spiritual, unbidden and unconscious, grow up through the common, this is to be my symphony.

William Henry Channing


So, today's the second last day to the end of 2010. The year seems to have gone by in a flash, and I don't even know where to begin to take stock of all the things that have happened in my small universe. Our lovely, young cat and an equally lovely, elderly grandmother have passed on to a worldlier world. Two close girlfriends are (separately) expecting their first child. I've transcended from the shiny rungs of the corporate ladder to the CEO-ship of my own household in a matter of 24 hours (yeaaayyy, no regrets). I've climbed hills, ran two 10K races, been to Whole Foods and back - not on the same day, I hasten to add.

And then there's this blog. I started this blogging thing not because I really, really love to cook, but because I really, really like to write. There, that's the truth. With so much time on my hands and not much strategic thinking to be done, I didn't want my brain cells to flounder and die... so when by chance I stumbled upon the enchanting Orangette earlier this year, I was hooked. Who doesn't want to write like Molly Wizenberg? Food blogging it was! 

The rewards of this simple decision? I've gained:
  • more creativity in the kitchen (to the joy and sometimes, dismay of friends and kin) 
  • more technical skills (food styling, lighting, Photoshopping)
  • more new words/ingredients (muffcakes, squash blossom)
  • access to a whole, wide, wonderful world of food blogs
  • best of all, many new friends - kind, supportive, helpful and extremely talented friends who are my fellow bloggers and readers! 
This whole experience has been nothing close to what I had imagined and more rewarding than I'd ever anticipated - in fact, everyday I count my blessings with my fingers and toes until I run out of them. The digits, that is, not the blessings.


So today, on the second last day of the year, I made these Orange-Lavender Cupcakes to share with another one of my greatest blessings, my real-life friends. I liked how the fluffy batter cooked into a pillowy soft, gently floral and citrusy cake - the most wonderful cupcake real estate you can possibly sink your teeth into. And oh, that sticky orange glaze dripping down the sides had us all licking our fingers and smirking like the cat that got the cream ;-).


Before I move on to the recipe, here's the teaser. Lately, I've been preoccupied with this giddy, little publication and guess what? I'm giving it away! Come back again tomorrow if you want it....oh, I know you do.

These recipes will make your head spin!

Orange-Lavender Cupcakes
Makes 12-15 cupcakes
Ingredients:
Lavender Sugar
1/2 cup caster sugar
1 tablespoon dried lavender flowers

Cake Batter
2 1/2 cups plain flour
1 teaspoon baking powder
1/2 teaspoon baking soda
1/4 teaspoon salt
1/2 cup caster sugar
1 cup butter
1 tablespoon vanilla
4 eggs
3/4 cup sour cream
2 teaspoons grated or finely shredded orange zest

Orange Glaze
1 tablespoon butter, melted
1 cup sifted icing sugar
3-4 tablespoons freshly squeezed orange juice

Method:
1. Preheat oven to 165C/325F. Make the lavender sugar first by grinding lavender and sugar in a grinder until well blended.
2. Sift together flour, baking powder, baking soda and salt in a bowl. In another bowl, whisk the lavender sugar, caster sugar, butter and vanilla on high speed for about 4 minutes. Add eggs one at a time, beating on medium speed.
3. Alternately, add flour mixture and sour cream to the batter, beating at low speed. Lastly, stir in the orange zest.
4. Spoon batter into cupcake or muffin tray about 3/4 full and bake for 30 minutes. You can also pour the whole mixture into a large loaf pan and bake for 45 minutes or until a skewer inserted into the centre comes out clean. Leave to cool for 10 minutes before glazing.
5. For glaze, mix icing sugar with cooled, melted butter and enough orange juice to make a drizzling consistency. Spoon over the cupcakes, letting some of the glaze drip down the sides.

Thursday, December 23, 2010

Coconut-Cheese Ice Cream with Thyme, Cranberry Sauce and Spiced Walnuts

Growing up in the tropics, cheese really didn't feature much in our everyday diet. We had durians and fermented shrimp paste (belacan), and that was enough odorous foods for one culture to have to endure. It's all very different the kids growing up in this more global world now, of course. 
Coconut milk, on the other hand, does feature a lot in our tropical cuisine, from breakfast snacks, main meals and desserts. Saying that, however, our use of it nowadays is in more measured amounts due to the high oil and sugar content (coconut cream especially).
Like chalk and cheese
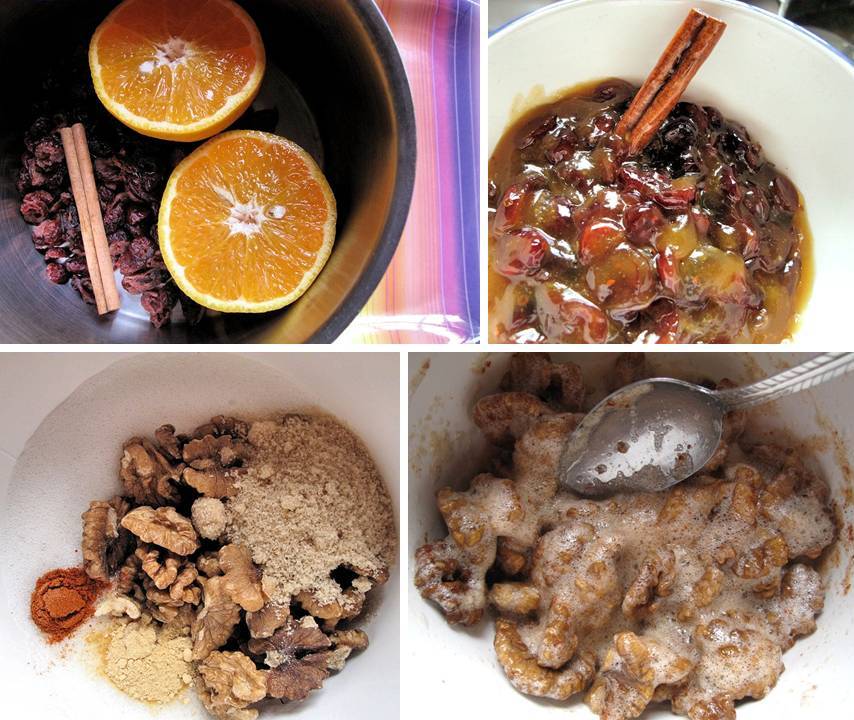
I've been toying with the idea of mixing one of the most Eastern ingredient with one of the most Western and finally came up with this Coconut-Cheese ice cream recipe. My tastebuds know for a fact that thyme goes extremely well with cheese so that was thrown in for good measure. On its own, this creamy, distinctively Cheddary ice cream is already worthy of a gasp. But try eating a spoonful of it drizzled with warm, cinnamon-scented cranberry-orange sauce and topped with spicy, gingery walnuts, and you're bound to hear absolute silence as the world around you stops moving! Trust me when I say this, it is that good.


 Top: Cranberry-Orange sauce,  Bottom: Spicy walnuts
 
Out of the oven - spicy, sweet, crisp walnuts with ginger and cayenne pepper
Next time you have guests over for a party, be daring enough to serve this understatedly sexy, elegant and complex dessert all rolled into one. Oh, and remember to print out copies of the recipe as your guests will be asking for it!
If you're making this dessert for any adorable tiny tots, just substitute the coconut milk with regular milk and leave out the salt and spices.


Coconut-Cheese Ice Cream with Thyme, Cranberry Sauce and Spiced Walnuts
Ingredients:
Coconut-Cheese Ice Cream with Thyme
• 1 cup coconut milk
• 1/2 cup heavy cream
• 125g (4oz) cheddar cheese, grated
• 125g (4oz) cream cheese, diced
• 1/2 teaspoon ground thyme
• 3/4 cup honey
• 1/8 teaspoon salt

Cranberry-Orange Sauce
• 1 cup dried cranberries (or 2 cups fresh berries)
• 1/2 cup orange juice
• 1/4 cup brown sugar or honey
• 1 cinnamon stick
• 2 teaspoons vanilla extract
• 1 tablespoon cornstarch
• 1 tablespoon water

Spiced Walnuts
• 1 egg white
• 1 teaspoon water
• 2 cups walnuts
• 1/4 cup brown sugar
• 1/4 teaspoon ground ginger
• 1/4 teaspoon cayenne pepper or chilli powder

Method:
Coconut-Cheese Ice Cream with Thyme
1. In a small heavy bottom sauce pot, bring the coconut milk and heavy cream to a boil.
2. Remove from heat and whisk in the cheddar cheese, cream cheese, honey, thyme and salt.
3. Blend this mixture in a blender until smooth. Transfer to a bowl, then cool completely before freezing mixture in ice-cream maker.
4. Transfer to an airtight container and put in freezer to harden, at least 2 hours. Let ice-cream soften 5 minutes before serving.

Cranberry-Orange Sauce
1. Combine cranberries, orange juice, sugar/honey, vanilla and cinnamon stick in medium saucepan. Bring to boil over high heat, stirring until sugar dissolves; boil for 1 minute.
2. Strain into bowl. Reserve cranberries. Return juices and cinnamon stick to the same pan. Mix 1 tablespoon water and cornstarch in small bowl; stir into juices in pan. Stir over medium heat until juices boil and thicken, about 1 minute. Mix in reserved cranberries. Chill compote 2 hours.

Spiced Walnuts
1. Preheat oven to 120°C/250°F.
2. Whisk together egg white and water in a large bowl until frothy and stir in nuts. Stir together sugar, ground ginger and cayenne pepper/chilli powder and stir into nuts, coating well. Spread nuts on a lightly buttered pan and bake in middle of oven until dry, about 50 minutes. Cool and chop into bite-size chunks.

Assembly
To serve, scoop ice cream into sundae glasses, top with cranberry-orange sauce and chopped spiced walnuts.

Tuesday, November 30, 2010

Date and Orange Mascarpone Fritters & YBR November


If you feel like doing something very easy but still unusual for dessert next time you have some guests over for eats, then I have just the recipe for you. Dates are now in season and if you happen to have them in abundance in your pantry, you can whip these simple fritters up. Fill the pitted dates with the flavors of orange (zest) and creamy mascarpone, toss them in orange (juice) batter and fry. See... easy like Sunday mornings.


These are best made by using the sweet, thick, fleshy medjool dates which grow in Egypt and California. I didn't have any medjool on hand but a friend had just brought back and gifted me some dates from Saudi Arabia, so I used those instead. Not as large nor as fleshy, but they were just as sweet. Once coated in batter and deep-fried, the mascarpone just melts in your mouth as you bite through the batter. I would serve these warm with Cinnamon or Vanilla icecream, or both, why not?


Last time I fried up a batch of these fritters, I ate about 10 of them all by myself, curled up in bed with a cup of hot, creamy chocolate. While watching The Biggest Loser on TV. How ironic.

Date and Orange Mascarpone Fritters
Makes 20 fritters, serves 4
Ingredients:
20 medjool dates
Finely grated zest of 2 oranges
8 tablespoons mascarpone
Plain flour, for dusting
Oil, for frying

Batter
300ml freshly squeezed orange juice
100g (4 oz) self-raising flour

Method:
1. Split the dates along one side and remove the seeds. Set aside.
2. Mix the orange zest with the mascarpone. Stuff the dates with the mascarpone mixture and push back into shape.
3. Make the batter by whisking flour and orange juice together until smooth, getting rid of lumps. Heat the oil for deep-frying.
4. Dust the dates with flour and then drop them carefully one by one into the batter to coat. Lift the dates out of the batter with a spoon and place gently in the hot oil. Cook for 4-5 minutes until completely crisp and golden. Lift from the pan onto a plate lined with kitchen paper to absorb any excess oil.
5. Serve the fritters warm or cool with cinnamon or vanilla ice-cream.


One last thing, as you may know, Nancy of Spicie Foodie is hosting the Your Best Recipe event starting from last month. For November, I've submitted my recipe for Spiral Ravioli, in the mysterious (natural) hues of green, black and white. To check out mine and other bloggers' best recipes via Nancy's round-up, please click here.

Have a great 'date' with these fritters, peeps! (Cheesy, I know).

Thursday, November 11, 2010

Poetry Thursday #9: The Bakewell Tart That Wasn't

 Poetry Thursday #9: 
Beautiful dreamer, out on the sea,
Mermaids are chaunting the wild lorelie;
Over the streamlet vapors are borne,
Waiting to fade at the bright coming morn.
Extract of Beautiful Dreamer, Stephen Foster


Sometimes friendships begin in the unlikeliest of places. Like the bottom of the sea. No, I'm not alluding to the Mermaid Underwater Alliance nor to witty, talkative fish adorably nicked Nemo and Dory. I'm referring to diving buddies, mine in particular. When I decided to take up scuba diving a few years ago, I had just celebrated a milestone birthday. Not exactly an age to be taking up any sport of that (risky, foolhardy, wondrous) kind, but then one can't dictate when one is ever ready to do anything in this life - you just know when you've reached that point that you are, well, ready

The Great Underwater Alliance

On my first diving trip out to sea, I was paired with a guy who I wasn't exactly enamored with. Worse, he was a colleague, and even worse than worse, he was a techie. The department I was in was creative, funky, colorful and LOUD, while the tech people just seemed stealth-like, reserved and well, staid. I hadn't gotten along very well with them. Other than the fact that I had nothing in common with anyone on the technical team, they often ignored and sniggered at my trouble-shooting pleas! So seeing that my first dive buddy, whose task was to look out for my well-being while we were underwater (and vice-versa), was from the 'nemesis' camp, it gave me a baaaad, sinking feeling. If he'd wanted revenge, that was the time. I might as well have drowned myself there and then. And he was probably thinking the very same thing.

But oh, how wrong I was! Who I discovered that day was a kind, responsible and yes, even funny guy who checked all my diving equipment thoroughly before each dive and made sure my oxygen levels were always adequate (we funky, creative ones can get carried away with the fascinating view down there in the sea, you know what I mean?). As I result, I felt safe and from then on, the techie and I became more than just dive buddies. We became friends. No longer were my working days filled with frustration whenever something went technologically amiss.

So how does this story segue into bakewell tart? I'm not quite sure how it does, and if it does at all. I guess what I'm trying to say is that stereotyping people and things certainly did not help me grow as a human being and whenever I've done it, it often surprises me. Some people/things are just not whom/what they seem. Like this bakewell tart, for instance. As a young adult, I had lived in the United Kingdom for close to ten years and in all that time, never once did a bakewell tart pass through my lips. The people of Derbyshire, where this dessert originates, will probably kill me for saying this, but the tart looked to my mind so sickly sweet and unappealing that I never desired it.


Until one day recently, of course, when a 'Best of British' cooking show on television had me enraptured with its chef's demonstration of a bakewell tart in the making. Oh dear, it hadn't looked sickly sweet at all, in fact, it looked rather appetizing! Since I've stereotyped bakewell tart so rigidly all these years, I wanted to set things right and taste one that I made myself. The components of this tart seemed easy enough - sweet shortcrust pastry lined with delicious jam, and topped with almond sponge or frangipane. My concessions were to use a rose petal and orange jam, with lots of sinful chocolate hidden underneath the frangipane layer! 


I used this recipe from the Smitten Kitchen, just replacing the jam layer with:
  • 1 cup rose petal jelly
  • 2 oranges, peeled and sliced
  • 200g dark chocolate, melted 
Boil, then simmer the rose petal jelly with the oranges for about 15 minutes until syrupy. Sieve to remove the chewy bits of orange. Spread the orange-rose jam on the base of the crust, then pour in the chocolate.

Oh lordy!

For the crust, I simply kneaded in the zest of 1 orange to add more flavor. If you do not chill the frangipane mixture for at least 2 hours (like I clearly didn't, below), the frangipane will mix into the chocolate layer slightly when you spread it. I didn't mind because I quite liked the marbly chocolate-almond effect. 


Orange-Rose-Chocolate Bakewell Tart.

This may be total blasphemy of a bakewell tart, but it's a path worth treading. I will never view this best-of-British tart in quite the same way again! 

Bake well, folks.

Thursday, September 2, 2010

Poetry Thursday #1 & Crazy-Colored Bread (Fruity Il Gianfornaio)

Poetry Thursday #1:
I don't know exactly what a prayer is.
I do know how to pay attention, how to fall down
into the grass, how to kneel down in the grass,
how to be idle and blessed, how to stroll through the fields,
which is what I have been doing all day.
Tell me, what else should I have done?
Doesn't everything die at last, and too soon?
Tell me, what is it you plan to do
with your one wild and precious life?

Extract from The Summer Day by Mary Oliver

Okay. I've decided that every Thursday would be dedicated to sharing my favourite poems with you. It gives more structure and meaning to my blog posts, something to look forward to each week. I like poetry, although if you just looked at me (or read me), you'd think I only ever read geeky, racy, corporate, foodie stuff. No, I like the lyrical, whimsical, silly, philosophical stuff too. Anyway, I thought you might like some of these poems too. You just never know.

So what has poetry got to do with food, really? That's a question I'm hard-pressed and not qualified to answer but nevertheless will try. They both have got plenty to do with emotions, filling a void, making the connection, feeling less lonely and more centred. Well, there are always social media, speed dating and religion too, but I'm not going to go into any of that. For me, reading beautiful, funny, cryptic, even violent poetry (and books) helps to fill some of my voids. Oh, eating does that too, but I'm acutely aware of how much nourishment and destruction my body can take, so I can't hope to eat all the time (don't we wish we could though?). But reading, I can, all the time. My brain will never explode from gaining too much knowledge. At least I hope not.


Saying that, reading through Diva D's Breadmaking book the other day left me a bit frustrated. There was a picture of a beautiful Australian vegetable bread called Il Gianfornaio, which wasn't accompanied by a recipe. Aaaargghhhh....! There wasn't much information on the net either, but I did stumble across this self-concocted recipe by Arundathi of My Food Blog. After 3 nights of tossing and turning in my bed obsessing about this multicolored bread, I woke up (though I never slept much all that time, anyway) and decided, it's time.


Fruit juices, matcha powder and chocolate filling

The only thing was, I really didn't fancy blanching, squeezing, mashing and blending all those vegetables to get those lovely colors. That was how I settled on making a fruit bread instead. I had some colorful fruits patiently awaiting their destinies in the pantry, so hey, let's go bend the rules a little! Besides, I'd already decided in my mind that the combination of brightly colored fruits would smell and taste great in the bread.


The bread would be made into smaller rolls as I want each person who gets handed this baby to enjoy its beauty individually. And because I'm such a slave for chocolate, there would be a piece of cocoa heaven embedded within the roll. Hmm, I really don't need to explain myself when it comes to my favourite ingredient!

So here are the fruity fellows and the corresponding colors they naturally imparted to the bread dough - raspberries (red), oranges (orange), coconut milk (white), mangoes (yellow) and matcha (green). Ah, so you spotted that I snuck green tea in there. Well, I didn't have avocadoes or kiwi or any green fruits in the house, and matcha just seemed the easiest choice to work with. Plus it generally goes well with fruity stuff, so I had my ass pretty much covered. ;-).


Let's see, how did the rolls taste? They were light, airy, wonderfully fruity! I ate them in two ways - by peeling the fruity sections apart to taste them individually (like a curious monkey) and then biting into them altogether to savour the homogeneity of flavors!

Oh yeah, this is going to Yeastspotting, my first submission ever. Won't be my last, for sure.

Fruity Il Gianfornaio
Makes: 8 rolls
Ingredients:
Basic Dough
1 cup all-purpose flour for each bowl
1/4 tsp active dry yeast for each bowl
3/4 tsp salt for each bowl
1 tbsp sugar for each bowl
1/2 tbsp melted butter for each bowl
110 ml juice for each bowl

Juices & powder
110 ml each of raspberry puree (red), orange juice (orange), coconut milk (white), mango puree (yellow).
1 tablespoon of matcha powder (green) and 110ml plain warm water.

Filling
100g chocolate, chopped into 8 equal, chunky pieces

Method:
1. Make the basic dough 5 times over. Mix the dough until it comes together using the dough hook. Add individual juices/powder to each separate bowl of dough.
2. Empty the dough out onto a floured surface and knead for about 10 minutes until the dough becomes smooth and elastic. Place in an oiled bowl and cover with cling wrap. Repeat for the other bowls. Set in a warm area and allow to rise until doubled in size (approximately 1 hour).
3. Take the dough out of each bowl and form about 8 small balls using your palms. Roll each ball to form a rope and for each roll, line all the 5-flavored ropes end-to-end next to each other. Pinch the ends together to seal and then form concentric circles upwards with the ropes (like a beehive hairdo!) and end up on top. As you are rolling up the ropes, tuck in a piece of chocolate in the middle of the roll. Tuck top end into the centre.
4. Place in a well-oiled round baking tray and cover with a damp, clean tea cloth. Allow to rest for about 1 hour.
5. Preheat the oven to 230C. Brush the tops of rolls with egg whites to glaze and bake for 15 minutes or until the bread is done (hollow sound when you knock on base of the bread with your knuckles). Remove from oven and cool on a rack. Serve on its own or with butter and jam.

Wednesday, July 21, 2010

I SCREAMED! Gelatos That Confuse The Tastebuds

All these recent banana split posts on Foodbuzz featuring their fab home made/store-bought ice-creams concoctions have triggered some sort of uhh… I don’t know, ICE-CREAM envy(?) in me. Thank goodness it’s not banana envy, eh, because that would be some kind of difficult for me to deal with! Before I go any further, I'm using 'gelato' and 'ice-cream' interchangeably here because they're the same thing ... aren't they? Well, I'm not such a food snob to admit that I don't really know the difference. Perhaps I'll Google it up later.

Anyway, I brainstormed on some ice-cream flavour combinations and looking at what I came up with, you could be forgiven for thinking that I'm a member of a well-oiled Gelato Think Tank somewhere this side of the ocean. But you’re wrong, I’m just wired differently. Especially when it comes to food.

Without further ado, I introduce to you:

Roasted Capsicum and Vanilla Gelato

Ginger~Chocolate~Orange Gelato

I'm sure I'm not the first one on the planet to make these, it's just I haven't seen Haagen Daz come out with these combis (I know they do ginger, just ginger though). Now, before you think anything untoward about these rather odd couplings of flavours, let me assure you that they really do work, are utterly delicious and you are able to taste each of the distinct flavours of roasted capsicum (or bell pepper), vanilla, orange, ginger and chocolate.

Not having in my possession the famed “Flavor Bible”, I’m not quite sure how I came up with these matches made in heaven. Let’s just put it down to my scary imagination and the fact that I aced Chemistry at high school and college! *high fives*

Btw, I don't have an ice-cream machine to my name (BFFs: please take note), so I made these using the age-old method of freezing/whisking/freezing/whisking/freezing instead. It's really no hassle and I quite enjoy the feeling of anticipation!

Roasted Capsicum and Vanilla Gelato
Ingredients:
• 1 cup whole milk
• 1 cup heavy cream
• 1 red capsicum (bell pepper)
• 1 egg
• 2 egg yolks
• ¾ cup sugar
• 1 tablespoon vanilla extract

Method:
1. Slice the capsicum in half, remove the stem and seeds, and roast under a hot grill until the skin splits and the capsicum softens (about 10 minutes). Cool slightly and peel off skin, then chop into slices. Set aside.


2. Heat the milk and cream in a saucepan just to the point of boiling and add the chopped capsicum. Remove from heat and steep, covered, for 15 minutes. Add the sugar and vanilla and reheat the milk and cream.


3. Meanwhile, whisk the egg and yolks in another pan until well-combined. Once the cream mixture is almost boiling, gradually whisk it into the eggs, constantly beating so that the eggs do not curdle. Gently boil over low heat until the custard thickens and coats the back of a wooden spoon.

4. Cool the custard mixture completely before churning either by hand or in an ice-cream machine. You can speed the cooling process by putting the bowl in an ice bath, but if you make your custard the night before like I did here, you can chill them overnight in the refrigerator and begin the churning process the next morning.
Some swirling action here.... and after 3-4 hours, Voila!
Ice-cream that tastes very cashew nut-like with a subtle peppery edge to it. Yes, it's really weird.

5. After I’m done chilling the custard, I put it in the freezer for an hour, take it out and stir the gelato to separate it from the edges of the bowl. I then blend with the hand mixer for about 15 seconds. I do this 3 times over the course of 3 hours then let the gelato freeze completely. If you’re diligent and willing to do this small task, take it from me, the results are better than the gelato in that swanky café down the high street!

Ginger~Chocolate~Orange Gelato
Ingredients:
• 1 cup whole milk
• 1 cup heavy cream
• 1 (2-inch) piece of fresh ginger, sliced thinly
• 1 egg
• 2 egg yolks
• ¾ cup sugar
• 1 orange, squeezed for the juice
• 125g (4oz) dark chocolate, chopped


1. Heat the milk and cream in a saucepan just to the point of boiling and add the sliced ginger. Remove from heat and let it steep, for 15 minutes. Then carefully fish out the ginger bits with a spoon and set these aside.
2. Meanwhile, whisk the egg and yolks in another pan until well-combined.
3. Add the sugar to the milk and cream and reheat. Once mixture is almost boiling, gradually whisk it into the eggs, constantly beating so that the eggs do not curdle. Gently boil over low heat until the custard thickens and coats the back of a wooden spoon.
4. Remove the custard from the heat and stir in the chopped chocolate until it melts. Stir in the orange juice (strain for pips beforehand). I had a flash of inspiration at this point and decided to throw the ginger bits back into the custard! So glad I did, because these really added bite and enhanced the gingery-ness of the ice-cream. I mean, come on, it had to compete with the dominant flavours of orange AND chocolate!


Ginger bits, we LOVE you and therefore you're staying.

5. Cool the custard mixture completely before repeating the churning process in step 5 above.

Baby, churn ~ churn ~ churn ~churn...

The great thing about eating ice-cream at home is that you can just about plonk it in the bowl any old how and not have to worry about it having to look all fancy like in a restaurant. It still tastes exactly delish and you even have the liberty of licking off the bowl at the end!

I hope you try these recipes out and let me know if there are any other odd combi flavors out there that go well together. Happy days, people!

Related Posts with Thumbnails