Foodiva's Kitchen: white chocolate
Showing posts with label white chocolate. Show all posts

Monday, December 19, 2011

White Chocolate and Cranberry Wreath Bread

Break open the forbidden happiness.
~ Rob Brezsny

I suppose I should warn you... this post contains graphic scenes of peace, love, joy, passion, reverence, splendor, and understanding. All in the form of food. So if you're feeling even the slightest bit jaded today, I suggest you proceed to read on with caution or else, come back another day. For this wreath bread is every bit as delicious as it is joyous to look at and what makes it even more splendid is that it is deceptively easy to make. Wish to be the next Bread Idol? Then you should attempt this recipe during the holiday season : ).


Following on from the success of my Happy Bread, a bouquet of pull-apart brioche rolls, I decided to use the same buttery dough and adapt it to the festive atmosphere by adding dried cranberries, candied lemon and orange peel (homemade) and white chocolate chunks. The yeasted wreath idea is nothing new, of course. When I first caught sight of this one on my Bread Idol's blog, Farine, I couldn't get the image out of my mind for weeks and knew I simply had to try making it myself! 


I had plans for a colored, candy-stripey kind of dough but in the end kept it simple as I didn't want any distractions from the decadent flavors. The first wreath bread I made I gave away to a friend, who asked how I created the spiky 'leaves' on the crust to look similar to dragon fruit skin? It was something that never occurred to me before, but once uttered, was all I could think of every time I see the bread spikes....Geez.


As far as I am concerned, you need only three skills to make this incredible bread - kneading, braiding and snipping (with a pair of scissors).  If you're a hairdresser, you're probably already three-quarters on your way towards producing a beautiful wreath bread should you ever want to do so. And oh, you really should want to!

So we've come to the part I have set aside for some reverence and gratitude. I am not kidding when I say how in awe I am of the many, many, MANY people who have pinned (on Pinterest) the picture below and who have baked/are planning to bake this Happy Bread. As a big thank you to you all, I have made a quick video that shows you how the cut dough pieces are magically transformed into the bread bouquet below. Enjoy!


Happy Bread (above) and how-to video (below)


FUN STUFF OVER THE WEEKEND- HARVESTING OUR OWN RICE

Passion. I've never equated it with anything much to do with romance but love, yes. A grand love for life! And speaking of passion, both my parents have a great love for the land. Or rather, growing things out of it. While it's unfortunate that I have inherited none of their mother earth-nurturing skills, I do have a strong leaning towards organically-grown food. Thinking of pure, unadulterated food makes my heart beat faster than say, thinking about Brad Pitt or (gulp) Paudge Behan.


And so via the sheer luck of it all, I was born to parents who happen to own a rather nifty vegetable patch and also acres of farmland on which to grow rice, or as we call that type of land here, padi fields. Last weekend, I managed to drag my sorry ass away from my hectic life long enough to visit the rice fields situated a few miles from our village. My dad is there everyday to oversee the harvesting season and we all enjoy helping lay out the rice grains for drying under the hot sun. Once dry, the grains will be milled to remove their husks and we'll have a supply of rice to last us until the next harvest, sometime next February/March. We are in the midst of the rainy season here now, so it is crucial to harvest the crop quickly on clear, sunny days. The heat from the sun feels so elusive and precious as gold right now. 

Anyway, where was I? Oh yes...peace, love, joy, passion, reverence, splendor, and understanding. Let's hope I've covered everything! 

P.S. I'm sending this post to Yeastspotting over at Susan's Wild Yeast. She also got married last weekend, so 'love' and 'joy' - double-checked!

Cranberry and White Chocolate Wreath Bread
Ingredients:
2 teaspoons dry instant yeast
1 tablespoon sugar or honey
100ml warm milk
1/3 cup dried cranberries
1/4 cup candied orange and lemon peel, chopped
1 orange, juiced
100g white chocolate, finely chopped
500g all-purpose flour, plus extra for kneading and flouring
1 teaspoon salt
2 eggs, lightly beaten
150 ml warm milk (extra)
2 tablespoons olive oil
1/2 teaspoon vinegar or lemon juice
100 g butter, melted and cooled

Method:
1. Dissolve yeast and sugar in 100 ml warm milk, cover and leave in a warm place to rise 10 minutes.
2. Soak the cranberries and candied peel in the orange juice in a bowl and leave for at least 1 hour before use.
3. In another bowl, sift the flour and salt together. Make a well in the middle and add beaten eggs into it, the remaining warm milk, olive oil, vinegar and yeast mixture. Knead the dough with your hands or in your mixer until it separates from the sides of the bowl. Remove dough, place on lightly floured surface and knead for about 10 minutes until it becomes a soft, pliable dough. Place in a greased bowl, cover with a towel and leave to rise in a warm place until doubled in volume - about an hour.
4. Punch risen dough and transfer on a lightly floured surface, divide dough into 3 equal parts. Roll each piece of dough out into a roughly rectangular shape with a thickness of 1/4-inch. Brush cooled, melted butter over each piece. Reserve the rest of the butter for later.
5. Drain the soaked dried fruits, mix with the white chocolate and divide into 3 portions. Sprinkle 1/3 of fruits and chocolate on a buttered piece of dough. Press fruits lightly into the dough so they stick. Take the long edge and roll/ shape it into a rough cylinder. Do the same to each of the other 2 dough pieces.
6. Keep on rolling until you get a 30-inch long rope. (Note: It's best to do it in stages: roll out the first one to about 20 inches, then put it back under the plastic sheet and roll the next one, etc. By the time you come back to the first one, it will have slackened some and it'll be easier to get it to the desired length).
7. When you have your three ropes, braid them into a thick plait, then join the ends to make a wreath. Press ends firmly together. Cover with towel and leave the dough to rise in a warm place for about 30-40 minutes.
8. Preheat oven to 180C. When the dough has risen, brush all over top of the bread with the melted butter. Reserve some butter for when the bread comes out of the oven.
9. Take a pair of scissors and cut 1 to 2-inch "leaves" by snipping horizontally in each section of the braid. (Refer to above video). Continue to snip leaves all around the wreath; the leaves will lift themselves up as the bread bakes.
10. Bake bread for 20-30 minutes, reducing the temperature to 160C after 10 minutes in the oven.
11. Brush bread with the remaining melted butter as soon as it comes out of the oven, cover with a towel and leave to cool for 10-15 minutes before eating.

Thursday, September 8, 2011

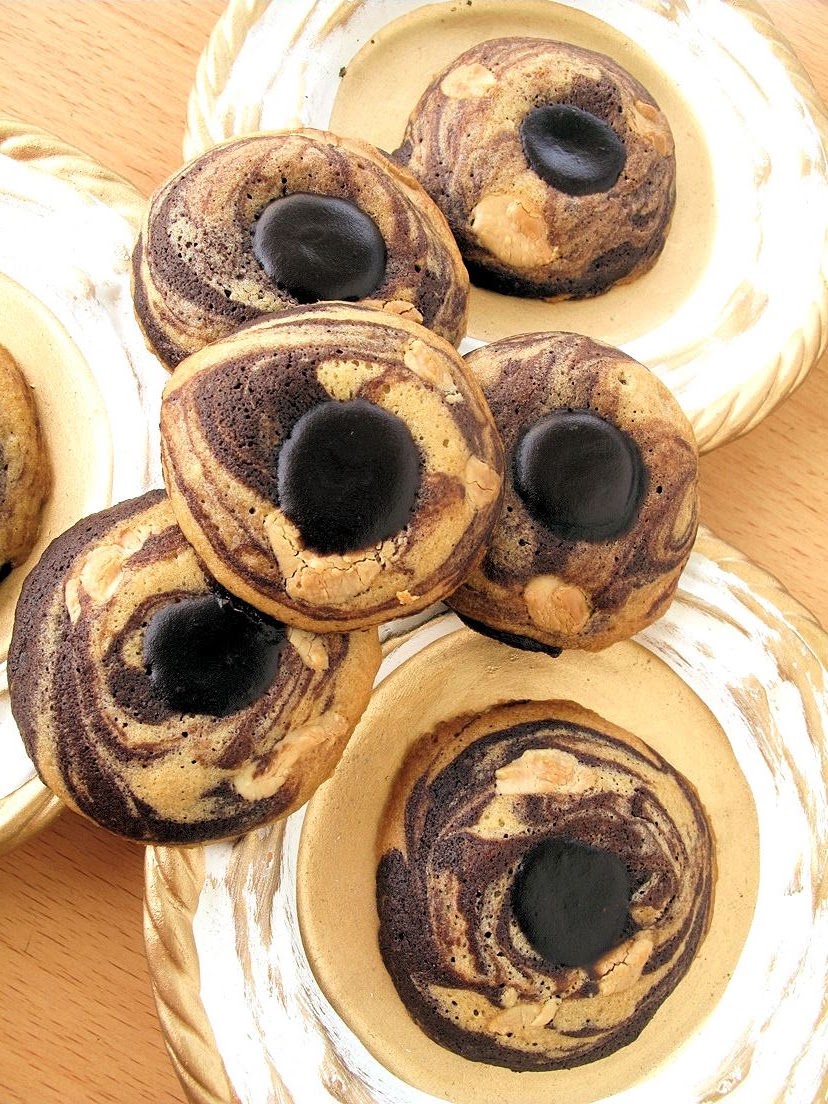
#BakeTogether - Spiced Up and Stormy #Irene Double Chocolate Nutella Mousse Cookies

Stop with the labels, we are not jam jars.
~ Caroline Casey

For those who were affected by Hurricane Irene a mere fortnight or so ago, it will be a while before they shall be able to forget the image below and the limitless power of Mother Nature. Despite humankind's incredible intelligence and technological prowess, something like this reminds us all of how helpless we are when pitted against such powerful forces of nature.

Saturday, March 26, 2011

Vanilla Rooibos with Coconut and Macadamia Bread Pudding and YBR


Your kind words and support have made me feel like it's time to come out of the woodwork and cook up something nice for you. Think of it as my Thank You :-).

I also feel that I need to fulfill some obligations to fellow bloggers this month. The first is the Bread Pudding of the Month Club hosted by my lovely friend, Victoria at Mission Food. Anyone who has made bread pudding during the month of March is invited to link up to her event, and I'd greatly encourage you to check it out before the month is out, soon! This is my contribution: Vanilla Rooibos with Coconut and Macadamia Bread Pudding, topped with White Chocolate Cream Sauce.


I first discovered this blend of Vanilla Rooibos tea when I stayed at an upscale serviced apartment in Virginia last year. The housekeeping ladies, bless them, left out fresh fruits, pastries and the most amazing coffees and teas for their guests every morning and I guess that was where I got hooked on this rich and full-bodied tea with a creamy vanilla finish. This organically-grown Rooibos is also rich in vitamins, minerals, and antioxidants, and is a naturally caffeine-free infusion, so it was only inevitable that I cargoed home boxes of the stuff when I left Virginia! They're distributed by Tealeaves.com, in case you're interested.

Since I love the heavenly aroma, I decided to flavor my bread pudding with Vanilla-Rooibos and wrapped the bread with coconut and macadamia to give a lush, tropical feel to it. But that's not all, top the warm pudding with a white chocolate cream sauce and you know you've arrived in the big leagues when you take a bite out of this. It's called the Power of Attraction, don't you know?

Here's the step-by-step, folks:

Now for the slightly tedious part, but only slightly....


Bringing up the rear for another event, please head out to Your Best Recipes hosted by the lovely, uber-accomplished Nancy of Spicie-Foodie. My best recipe for February was my Valentine's Cupid's Cobbler made of plums, cream biscuits and rose-basil seed cream! Check out her site for other participants' contributions or send her your best recipe before the end of March. Gosh, I just realise that I haven't got any recipe, let alone a best one, for March! But there are a few days left, and there's hope yet....

Vanilla Rooibos with Coconut and Macadamia Bread Pudding and White Chocolate Cream Sauce
Ingredients:
Bread Pudding
2 organic Vanilla Rooibos teabags
1 litre milk
1/2 cup palm sugar, grated
2 eggs, lightly beaten
8 slices stale bread, crusts removed
50g butter
1/2 cup sweetened dried coconut slivers, chopped finely
1/4 cup macadamia nuts, chopped finely
Butter, for greasing pan

White Chocolate Cream Sauce
200g white chocolate
200ml heavy cream

Method:
1. Butter a shallow baking dish (1-2 inch deep) and set aside.
2. Flatten each bread slice with a rolling pin and use the rest of the butter to spread on one side of the bread slice.
3. Spoon about a teaspoon each of chopped coconut and macadamia on top of a buttered slice, then roll the slice tightly to form a cylinder. Cut each cylinder into three 1-inch long slices and arrange the circles tightly (cut-side up) on the base of the baking dish in one layer. Do this with all the bread slices until the dish is full. Set aside while you make the custard.
4. Place the milk and vanilla rooiboos teabags in a pan and heat until just starting to boil, stirring constantly to prevent the milk from burning. Remove from heat while you prepare the egg mixture.
5. Whisk eggs and palm sugar in a small bowl, then add a cup of the warm milk and beat further. Pour this mixture back into the pan with the rest of the milk and stir until it just starts to simmer. Remove the teabags.
6. Carefully spoon the custard onto the bread slices until they are completely soaked and the custard reaches the rim of the baking dish. Bake at 180C for 30 minutes. Drizzle with white chocolate-cream sauce before serving.
7. For the sauce, simply warm the cream in a pan on medium-low heat and add the white chocolate until completely melted. Use immediately.

Saturday, February 19, 2011

Forever Nigella - White Chocolate and Passionfruit Mousse

Put “eat chocolate” at the top of your list of things to do today. That way, at least you’ll get one thing done.
Rules of Chocolate

I've always been a bit apprehensive about making mousse from scratch. I suppose the thought of perfectly fluffed-up egg whites collapsing into pool of slimy goo in the serving dish hasn't exactly encouraged me into making this delightful dessert more often. Well, that was about to change the day I made this White Chocolate and Passionfruit Mousse. Of course, the white chocolate sealed the deal because any dish with chocolate in it is instantly elevated a few notches in my biased, sweet-toothed view.

Served in frozen passionfruit shells...how's that for guilt-free portions? ;-)

Everything about this dessert, I later found out, is a study in contrasts. The richness of the white chocolate against the light texture of the mousse. The sweetness of the (again) chocolate versus the refreshing tartness of the passionfruits and plums. The pale, yellow color of the mousse set against the dark, crimson hue of the plums. The only uncomplicated thing about this dish really is the recipe, which can be found at Nigella.com. No wonder we love Nigella, and no wonder we are seduced by her...umm, ways with chocolate!


I was lucky to have come across fresh passionfruits in the market recently, so I had several in my pantry I could use to make this mousse. The original recipe also called for fresh raspberries, which of course, are near impossible to find right now so I ended up using red plums instead. The substitute fruits didn't affect the overall flavor combinations one bit and best of all, the white chocolate mousse held up. I think I may have finally made my peace with mousse...


Of course, being the unabashed glutton that I am, I made these in individual glasses instead of a large serving dish. Each glass, you may be interested to know, has a more-than-one-but-less-than-two-servings capacity. Well, it may be slightly 'less-than-three', but the point here is to divide it any way you wish to eat it. Whichever way you choose to apportion this dessert, I'm sure Nigella would approve as long as you then eat it with a knowing smile and a naughty glint in your eye!


I'm sending this post to the second Forever Nigella event kindly hosted by Sarah of Maison Cupcake. It's always fun to support fellow bloggers in their initiatives, and of course, a great way for me to see what delicacies the other participants bring to the table!

Related Posts with Thumbnails