Foodiva's Kitchen

Thursday, November 4, 2010

Spiral Ravioli - Matcha and Black Sesame

"Life is a journey up a spiral staircase; as we grow older we cover the ground we have covered before, only higher up; as we look down the winding stair below us we measure our progress by the number of places we were but no longer are.”
The Winding Stair, W.B. Yeats

Eric Ripert brought me here. Well, not in person (although that would've been nice :-) ), but the other day I was watching him make ravioli on Avec Eric with this motherly and rather delicious Italian mamma. One chef was French and the other Italian, but for the sake of the programme and its global viewers, they communicated the virtues of homemade ravioli in their heavily accented English. The whole episode made me smile, not so much for the language irony but for the ease and elegance of the ravioli-making process. Something about the way Monsieur Ripert's hands was massaging the dough was hmmm... sexy. And it made me want some. Ravioli, that is.


I looked back at my pasta-making experience to date and can only really recall two times. Yes, you read that right - two. Once was when I made lasagna noodles out of red cabbage(!) and the second time was an attempt at making fetuccine out of tamarind pulp. Why hadn't I started with just plain dough? I don't really know the answer to that. I have a disturbing history of jumping in at the deep end and praying for things to work out alright ;-). Most of the time, I have been lucky. The rest of the time, I've conveniently forgotten about. Optimism pulses through my veins like a welcomed curse.


So I started to do some research on how to make ravioli and then dammit, I came upon artisan ravioli. Gourmet ravioli. Dammit, because they looked absolutely gorgeous! Even while I was learning and figuring out how to make the beautiful, striped ravioli, my brain hijacked itself and urged me to go spiral instead. From the recesses of my memory, I pulled out a technique for getting the spiral effect on pastry and theorized it would work for pasta dough as well. Basically, you need to use different colored dough that are layered one on top of the other, then rolled up like a cinnamon bun, sliced and finally flattened on the cut edge. Did you catch all that? Hmm, there's a reason why they say a picture paints a thousand words!
My colorings: Green - Matcha powder, Black - Black Sesame powder, White - Plain dough


The matcha and black sesame flavors were subtly released upon cooking, however it was the fresh filling of green pepper, cherry tomatoes, black olives, celery leaves and cream cheese that gave the ravioli the punch. I ate this with a simple garlic and butter sauce which complements all the wonderful flavors already contained in my spiral version of artisan ravioli. Eric, you should come over and learn to make these from this mamma!


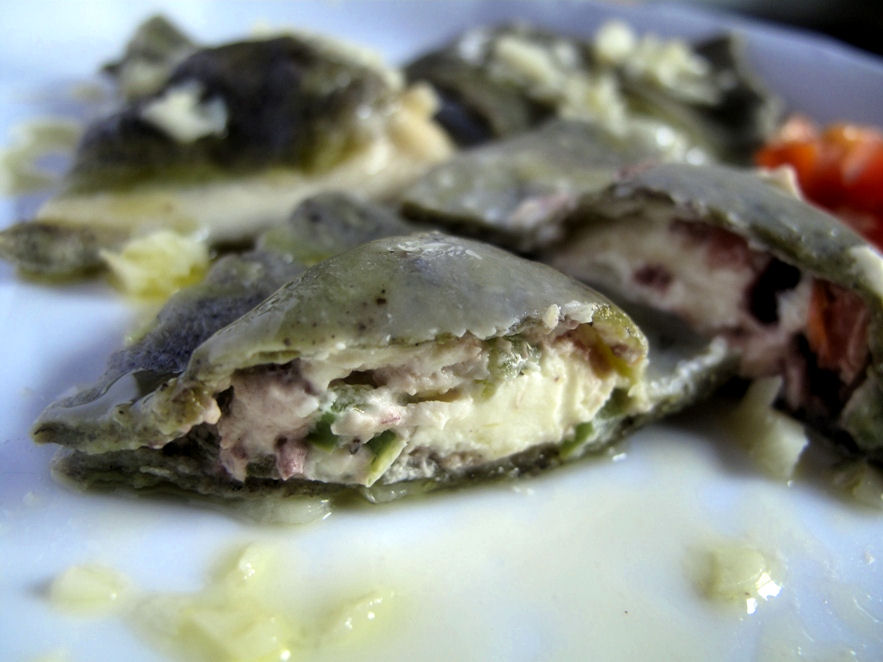

Spiral Matcha and Black Sesame Ravioli
Servings: 1-2
Ingredients:
Pasta Dough:
2/3 cup plain flour
1 tablespoon plain flour, to adjust dough consistency
1 egg
1 tablespoon matcha powder
1 tablespoon black sesame powder

Filling:
1/2 green bell pepper, diced finely
4 cherry tomatoes, chopped
6 black olives, pitted and diced
1 stalk celery leaves, chopped finely
100g cream cheese, softened
salt and pepper, to taste

Method:
1. Place the flour in a food processor. Add egg and process for 10 seconds until the flour is moist and crumbly. Adjust by adding some more flour to the dough if it is extra sticky and process further. Each time you stop the machine, pinch the dough between your fingers, it should feel firmer each time. After about 30 seconds of processing, the dough should come together and form a loose ball on top of the blade, and feel moist but not sticky when pinched.
2. Take the dough out, and cut into 3 equal portions. Leave one plain, to each of the other knead in the matcha and sesame powder. Sprinkle some flour on a hard wood surface and start to knead the dough pieces separately. With the heel of one hand, push the ball of dough away from you. Fold it back toward you and rotate the dough a quarter turn. Repeat this process until the dough feels damp without being sticky, then stop kneading (about 1-2 minutes). Shape dough into a ball and cover with a large overturned bowl, let it rest for 30 minutes.
3. Take the green dough and roll to flatten. Divide the plain dough and black dough into two pieces each. Place one piece of black dough on top of the green dough, then wrap the green dough around it. Pinch to seal edges, and roll again to flatten. Repeat process of wrapping and rolling with the rest of the dough pieces. (The layers and sequence - green, black, white, black, white).
4. Roll the layered dough to form a ‘cylinder’, then slice across the cylinder to get round discs about 1/2 inch in thickness.
5. Run each disc through pasta machine as per the instructions, until it is thin enough for your ravioli sheet (I went up to No. 4). You will see the spiral effect on the flattened dough, almost like a Mexican sombrero.
6. Mix together the ingredients for the filling in a bowl. Place about a teaspoon of filling (for each ravioli) on top of one spiral sheet and place another ravioli sheet  to cover it. Pat down around the filling to seal dough, then cut into shapes with a ravioli cutter. Gently pinch edges of ravioli to seal it further.
7. Boil water with some olive oil and cook the ravioli for about 10 minutes until the edges are soft but still chewy. Serve immediately with (chopped) garlic sauteed in butter sauce. 


Tuesday, November 2, 2010

Savory Onion, Garlic and Purple Sweet Potato Pie


I can't even remember how long ago it was that I had learnt to make this pie. All I remember was that the first time I made it, it actually tasted better than it looked and much, much better than I had thought it would. Somehow at the time, I had been more of a pie person than a cake person - as far as baking them was concerned. There could be several reasons for my pie-affinity: pies don't sink, they always look warm and inviting on a table, they are easy to make and hard to get very wrong that they're rendered inedible. Pies and I, we have a good history together and we are that (links index fingers) tight.


 Fresh lemon basil and oregano from my garden

Of course, years ago, purple sweet potatoes were not part of this recipe. However today, I am still very much enamored by these purple beauties, and so have decided that they will add an extra, sweetish dimension to this savory pie. Unfortunately, I only had about half the amount of purple sweet potatoes required left in my kitchen, but if this pie were to be redone another day, I would definitely add more potatoes.

The best bits about this pie are the oregano-flavored crust and a hint of lemon basil in the sweet-savory filling. If you're wondering about this herbal combination, well, oregano and basil are the only herbs currently thriving in my garden and are therefore the most obvious choices. Previously, I'd always used dried oregano to flavor the crust, but using fresh leaves this time around gave the pie that extra kick.

Butter, black pepper, flour and salt for the crust
 Oregano strips kneaded into the pastry
My masseuse taught me that if you soak your onions and garlic in water for about 30 mins,
the skins slip off effortlessly. Funny the sort of things you can learn on the massage table!

Quite purposely, I left the garlic cloves whole and they cooked beautifully and became so tender in the pie. Bite into a slice of this creamy pie and you can immediately savor how the softened garlic and onions lend their very subtle but distinct flavors. Of course, the Purple Queen of Carbs (but good carbs!) adds beauty and interest to an otherwise just rustic-looking dish. The beauty of this pie is that it also keeps well for up to 3 days in the refrigerator, so you can have a slice for breakfast, bring it into the office for lunch or pack it up for a picnic in the park. Want your guests/family/friends to come back for seconds? Go on and make this versatile pie!


Savory Onion, Garlic and Purple Sweet Potato Pie
Ingredients:
Pastry Base:
250g plain flour
125g cold butter, cubed
1/4 teaspoon salt
1/4 teaspoon ground black pepper
1 egg
4 fresh oregano leaves, julienned

Filling:
2 large onions, sliced
10 cloves garlic, leave whole
10 basil leaves
3 tablespoons olive oil
200g purple sweet potatoes, sliced and steamed
250ml heavy cream
4 eggs
salt and pepper, to taste

Method:
1. Preheat oven to 200C.
2. Make pastry crust first: Put flour, salt, pepper and butter into a large bowl. Rub cold butter into flour until it resembles breadcrumbs, then add the sliced oregano. Crack the egg into a well made in the flour mixture and knead with your hands for about 2 minutes until it forms a smooth dough. Add a bit of flour if necessary, the pastry should still be pliable but not sticky.
3. Roll  the pastry out to line greased a 9-inch pie tin (I found it easier to press the pastry in using my palm and finers). Trim the edges of the crust by pressing down on the sides of the tin and breaking off the dough.
4. Prick the base of the crust with a fork, line with baking paper or aluminium foil and bake for 10 minutes.
5. Reduce temperature to 180C, take pie tin out of the oven and remove the paper or foil.
6. For the filling, slice the purple sweet potatoes into round pieces and steam for 30 minutes until cooked through. Set aside to cool.
7. Saute the onions, garlic and basil leaves with olive oil for 5 minutes until the onions are soft and translucent. Leave to cool slightly. Spoon this mixture into the pie crust, making sure the ingredients are fairly evenly distributed. Arrange the sweet potato slices around the pie evenly before pouring over the cream topping.
8. For topping, whisk together heavy cream, eggs, salt and pepper in a bowl until fully combined. Pour this carefully into the crust, making sure the potatoes stay in place.
9. Bake for 25 minutes until the topping is just firm to the touch and a skewer inserted into the centre comes out clean. Serve warm or cold with salad or soup. 

Monday, November 1, 2010

Sexy Sushi And An Award


Tell me honestly now, if you were a food item, wouldn't you want to date these hot-looking sushi? Look past their understated sex appeal, and you'll find that everything about them is healthy, wholesome and yes, even vegan. Purple sweet potato (oooh!), carrot and spring onions are snugly wrapped around with tasty organic brown rice and flavorful Nori. Looking at these rolls, I just wanted to break into song... ~Oh My Gosh....there's so many ways to love you!~  (To be sung to Usher's O.M.G., btw).


How to make these and impress your green-eyed family and friends? It's not nearly as stressful as you may imagine. Here's a simple pic-tutorial, followed by the recipe:


 The filling - spring onion leaves, purple sweet potatoes and carrot strips
 The stuff holding it all in - organic brown rice (+ nori sheets, of course)
 Line up filling ingredients neatly at one end

 Roll, roll, roll (you can see I forgot to lay down the nori here!)

 Slice and here you have it, the delectable Ms. Sushi

This is only my second time using brown rice in a recipe and also the second time that I've ever attempted  to roll sushi. Second time? Yep, if you would like to check out my 'virgin' brown rice and sushi attempts, click on the links below: 

Brown Rice Sushi with Purple Sweet Potato, Carrot and Spring Onion Filling
Makes: 2 sushi rolls
Ingredients:
1 cup brown rice
2 cups water
2 tablespoons rice vinegar
1 medium purple sweet potato, cut into strips and steamed
1/2 a medium carrot, sliced into long strips and steamed
2 spring onions, use the leafy, green part only
2 Nori sheets (dried seaweed)
salt and pepper, to taste

Method:
1. Wash the brown rice in water, draining the water several times, then boil in 2 cups of water. You can cook this either on a stove or in a rice cooker, until the rice is fluffy and soft.
2. Once cooked, stir in 2 tablespoons of rice vinegar and a pinch of salt and ground black pepper. The vinegar helps bind the rice grains together to make it easier to roll. Leave to cool.
3. Prepare the vegetable fillings: Steam the slices of purple sweet potatoes and carrot for about 15-30 minutes until softened. Leave these to cool outside the steamer.
4. To assemble, spoon the cooled brown rice it onto a nori sheet placed on top of a bamboo rolling mat. Flatten with the back of a spoon following the shape of the nori sheet. Leave 1 cm of nori on one edge without any rice. If you don't have a proper rolling mat, use aluminium foil lined with cling film and place your ingredients to be rolled on the film instead.
5. Line up your fillings in 3 straight lines, then start to roll forward from the end nearest to you (where the rice is closest to the edge). Make sure you press firmly along the length of the rolling mat so the rice and filling can spread a little to the opened ends. Seal the roll by moistening the unfilled nori end with a bit of water.
6. Slice the roll across about ½ inch thick with a sharp, wet knife. Dip the blade in water to moisten it in between cuts. Serve with soy sauce and wasabi dip.


AWARD

Wait! I'm not finished yet.... A few days ago, I received this Lovely Blog Award from the cutest bird in the food blogging universe, Chef Gerald a.k.a. Jerry at Bistro Gerard. Yes, did you know that even parrots have their own blogs nowadays and this ninja birdie can cook up truly ah-mazing recipes? Although it can't be easy typing with those well-manicured claws (with only three fingers on each) and I suspect his Mummy, Anca, must help a lot in the keyboarding department. I may be wrong, so please correct me if I am, Chef and please, don't take this award away because I said something about your typing! Thank you for reading my posts all this time and for sending this award my way.

It's always a pleasant surprise to get some recognition from fellow bloggers either through their comments, emails, tweets and through awards like these. And quite wonderful to know that they weren't all from my mother either (signing in under the guise of various bloggers)! Now, it's time for me to "share the love" by passing this award on to 15 other bloggers whose posts I find simply amazing and make me want to wake up every morning to read. If you're smart, you'll want to check them out too!

1. Jennifurla @ Indigo's Sugar Spectrum
2. Michael @ Me, My Food and I
3. Margaret @ Savory Sweet Living
4. Krystle @ Quaypo Cooks
5. Carolyn @ All Day I Dream About Food
6. Roxan @ Kitchen Meditation
7. Cherine @ Chico's Kitchen
8. The Cook and The Dishwasher
9. Karen @ Tasty Trials
10. Maybelle's Mom @ Feeding Maybelle
11. Azmina @ Lawyer Loves Lunch
12. Lauren @ Foodie House
13. Jeff and Heather @ He Cooks...She Cooks...
14. Russell @ Chasing Delicious
15. Sonia @ Nasi Lemak Lover

Sunday, October 31, 2010

Your Best Recipe - My Sweet, Purple Amore


Let me reveal a side of myself you probably wouldn't know - I am a Recipe Narcissist. I get a real high when these hands (and this unfathomable mind) can come up with something original, beautiful and delicious to boot. Unfortunately, I only have one blog to showcase these recipes. Fortunately though, there are many talented, creative food bloggers out there who graciously host great "events" or round-ups where we can link our posts to. I am so grateful to them, these unknowing enablers (in a nice way, truly) of my recipe-narcissistic tendencies.

An initiative that begins today is Your Best Recipe (YBR), hosted by the amazing Nancy of Spicie Foodie blog. To me, she is a photographer extraordinaire who portrays her spicy-laden dishes in photos that often make me gasp. Yes, she's THAT good! By hosting these monthly YBR roundups, Nancy is actually sharing her limelight (in the best lighting possible ;-)) with fellow bloggers who wish to draw the blogosphere's attention to their best recipes posted within the month. This is the start of what I believe is a great resource and I'm encouraging you to head over to Spicie Foodie right now to read the various bloggers' best (BEST!) recipes for October.

So what's my best recipe this October? It's a dainty dessert, topped with some crazy purple mousse noodles (preview below).
If it's killing you to find out what our best recipes are for October, go and check out Your Best Recipe now. Hope you all had a terrifyingly happy Halloween!

Thursday, October 28, 2010

Poetry Thursday #8: Green Tea Rolls With Purple Sweet Potato Filling

Poetry Thursday #8:
My life, so wonderful,
So toilsome; stressful.

Nothing to look forward to,
At least for the moment.
Reoccuring irritants,
Constant lies; deception.

Pleasure, not as pleasing,
Tastes are going bland,
The spice of life fading,
Regressing; retreating.

I ponder these things,
While sitting at the edge,
The edge of my sanity,
This foothold; ledge.

I entered this world,
To someone screaming,
Now I say the same word,
I'm begging; pleading.

Any last words?
Just fucking push already.

Push... by David Robichaux Jr. 


I might as well declare this week Purple Sweet Potato Celebration Week. For the past several days, I had carefreely indulged my obsession for purple-colored food, namely (you guessed it), purple sweet potatoes (PSPs). It all began when I'd spotted some freshly dug (still coated in soil) PSPs at the market over the weekend. Against my better judgement, I grabbed a few of the tubers, all the while scheming up something beautiful and delicious with them in my head.

Today is only Thursday, but I've already rustled up five - yes, FIVE - new recipes using my favorite purple vegetables! I suppose I'll stop only when they run out (just hoping there are no Withdrawal Symptoms!). I'm not going to extol the nutritional virtues and versatility of PSPs again, but if you're new to these lovelies and are pretty curious, click on the links below for my previous posts on these purplies:

Purple Sweet Potato Pie with Easy Oats Crust
Rockin' Pink and Purple Scones
Mont Blanc-Inspired Purple Sweet Potato Cakelets


For today's recipe, I attempted a pairing of matcha (green tea) and PSP flavors in a bunch of sweet rolls, and the outcome was unexpectedly delicious. The potatoes went very well with the green tea, the two very distinct earthy notes blended brilliantly to striptease the palate. Yes, very naughty! The success of this recipe surpassed even my expectations. And the colors, OH... So drop-dead gorgeous. Like a well-matched outfit, on a good hair day.


The three layers: green tea (roll), brown sugar and purple sweet potatoes (filling)


Experience the luscious feeli...err, filling.

Maybe these vibrant rolls will stir up some excitement on Yeastspotting @Wild Yeast and Recipe Swap Thursday @Prairie Story, where I'm sending it to!
 
Green Tea Rolls With Purple Sweet Potato Filling
Makes: 12 rolls
Ingredients:
Dough:
1 teaspoon dry, instant yeast
1 cup warm milk
1/2 cup white sugar
1/3 cup margarine (or butter), melted and cooled
1 teaspoon salt
2 large eggs, room temperature
4 1/2 cups bread flour
3-4 tablespoons matcha powder

Purple Sweet Potato Filling
400g sweet potatoes, boiled and mashed
1/3 cup butter, softened
1 cup brown sugar

Method:
1. Dissolve the yeast in the warm milk in a large bowl. Mix in the sugar, margarine, salt, and eggs. Add flour and matcha powder, mix well. Knead the dough into a large ball for about 5 minutes. Put in a bowl, cover and let rise in a warm place about 1 hour, or until doubled in size.
2. After the dough has doubled in size, turn it out onto a lightly floured surface, cover and let rest for 10 minutes.
3. Roll dough into a 16x21 inch rectangle and after that prepare the filling.
4. Assembly: Spread dough with 1/3 cup butter and sprinkle evenly with brown sugar. Add the mashed, cooled purple sweet potatoes one spoonful at a time on top of the sugar. Flatten layer evenly with a spatula.
5. Roll up dough and cut into 12 rolls. Place rolls (cut side up) on a lightly greased rectangular baking pan. Cover and let rise until nearly doubled, about 30 minutes. Meanwhile, preheat oven to 200C/400F.
6. Bake rolls until matcha layer turns slightly brown, about 15 minutes. Leave to cool on a rack for 15 minutes before serving (careful, the filling will be very hot when it comes out of the oven!).

Tuesday, October 26, 2010

Mont Blanc-Inspired Purple Sweet Potato Cakelets


Apart from macarons, the only other dessert that I have kept a considerable distance from (baking-wise) is Mont Blanc. On both counts, I'm so afraid to fail. Visions of flat, brick-like macarons and lumpy chestnut noodles haunt me everytime I peruse through fabulous recipes involving these two sweets. Other kitchen warriors have been there, done that, conquered their fears. I know I should be heading the same way and get past my discomfort zone (God knows I've cooked up more brain-twisting recipes!), but I also know I needed to be ready in my own time.


Today, as I was busting my chops climbing ten hills under the blazing heat of the morning, it finally hit me. There I was, a strong, fearless Indiana Jane-type who can traverse various degrees of rough terrain pretty effortlessly, and I was afraid of what? Two miniscule desserts that are popular in France (and Japan)? It was on the way home, still covered in dry dust, that I decided the time has come to rip off those training whisks and bring on the heavy artillery. I was going to finally attempt Mont Blanc. The most beautiful version I could muster.

Fits right in the palm of my hand.
Now, the traditional Mont Blanc topping is usually made with chestnut puree. To be honest, the combination of having to tediously produce chestnut puree from scratch plus its natural sepia color left me more than a little lustless. If I was going to do a Mont Blanc, it definitely would be far from Blanc. Mine would have a vibrancy that reflects who I am! Exit chestnuts, enter purple sweet potatoes. Both were equally comforting, at least that was my justification to stave off any iota of guilt about the switch.

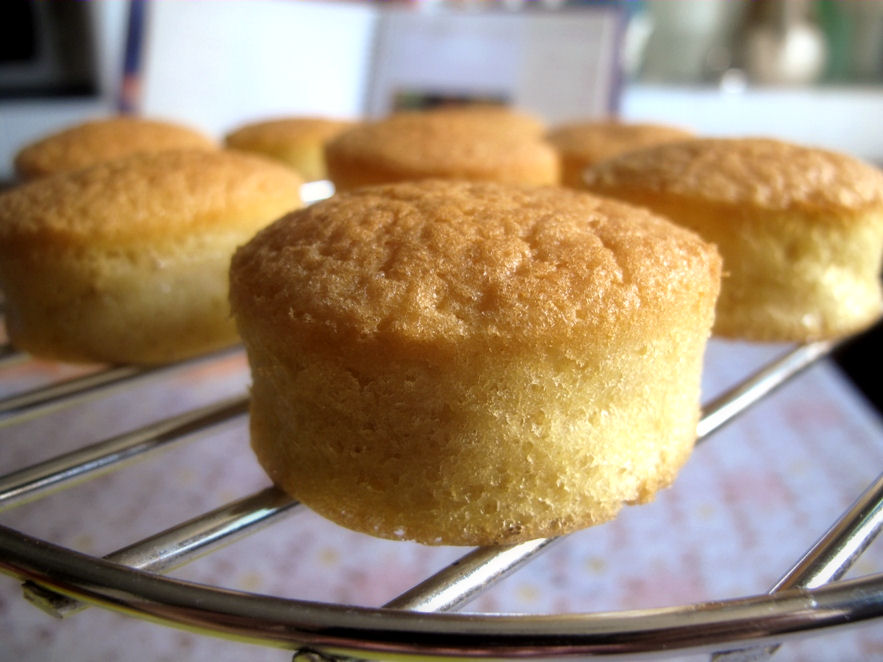
I didn't really want to spend a huge amount of time making a cake base worthy of a thesis, so I stuck with a light butterless recipe I always use for thin bases most suited for mousse cakes. It was good for this purpose too, and more importantly, it was dead easy to rustle up. This was baked while waiting for the sweet potato mousse and chocolate ganache to firm up in the fridge. Oh, did I mention chocolate ganache? Yes, I substituted the traditional meringue filling for Mont Blanc with ganache balls, and guess what? Sometimes, it's worth breaking a few rules to get a completely different experience of happiness!


Okay, so it wasn't totally authentic Mont Blanc. But if I hadn't told you that, would you even have known?


Mont Blanc-Inspired Purple Sweet Potato Cakelets
Cakelet (base)
2 large eggs
2 tablespoons hot water
¼ cup sugar
1 teaspoon vanilla extract
½ cup flour
1 teaspoon baking powder

Method:
1. Preheat oven to 170C. Beat eggs and hot water in a bowl until foamy (1 minute).
2. Add sugar and vanilla and beat further for 2 minutes.
3. Sieve flour, baking powder and salt together and add to the egg mixture. Mix quickly at the lowest speed.
4. Pour 1-2 tablespoons of batter (depending on the size of your mould) into the base of greased muffin tins. Bake for 20 minutes until risen and golden.
5. Leave to cool in the tin for 5 minutes before turning the cakelets out. Leave to cool completely on a rack.

Sweet Potato Mousse
1 ½ cups purple sweet potato, boiled and mashed
1 ½ cups milk
¼ cup sugar
¼ teaspoon salt
2 eggs
2 tablespoons cornstarch
2 teaspoon gelatine, softened in 2 teaspoons cold water
5 tablespoons of butter, softened

Method:
1. Place the mashed sweet potato, sugar, eggs, cornstarch and salt in a blender and puree until smooth.
2. Heat the milk in a large pan until it just comes to a boil, then remove from heat and pour quickly into the mixture in the blender. Blend ingredients for 1 minute, then return to the pan.
3. Let the sweet potato mixture boil for about 30 seconds, remove from the heat and stir in the softened gelatine until dissolved. Strain the mixture through a fine sieve into a bowl to remove any lumps.
4. Leave to cool for about 10 minutes, whisking occasionally. Beat in the softened butter one tablespoon at a time until you get a glossy, creamy mixture.
5. Once it is cool enough, place in the refrigerator for at least 2 hours before piping onto a cooled cakelet.

Chocolate Ganache (recipe here)
You would need to cool this in the refrigerator for a few hours (preferably overnight) so that the ganache is firm when you scoop it with a spoon.

Assembly:
1. Take a heaped teaspoon of firm chocolate ganache and place it on top of a cakelet.
2. Spoon the sweet potato puree into a piping bag, and using a plain round tip (eg. No. 7 Wilton), pipe concentric circles around and on top of the ganache and cakelet until a small purple mound is formed.
3. Garnish the top with a sprinkle of roasted, chopped walnuts and/or sesame seeds and serve immediately, or store in an airtight container in the fridge for up to a day.

Related Posts with Thumbnails