Foodiva's Kitchen: August 2010

Tuesday, August 31, 2010

Sago Gula Melaka


When we were young and our parents frequently hosted dinner parties at our house, one of the most oftenserved local desserts was Sago Gula Melaka. In Malay, that literally means sago pudding with coconut palm sugar. As kids, we eagerly watched this sweet being prepared and waited to be handed the 'extra' cups or bowls of this pudding that were not going to the guests. Yes, my mother always prepared extras for the "people of the house", meaning us. And they were usually many extras, which we then went on to share with the "people of the neighborhood"!


This sago pudding is enjoyed by many in the region (Brunei, Indonesia, Singapore, Malaysia, Thailand, Myanmar), and there are varying but very similar recipes on it. The sago on its own doesn't taste of anything much, but combined with the richness of palm sugar and coconut milk, their plainness is transformed into something magical on the tongue. We love the slippery texture of the tiny sago pearls and the fact that you can't really chew them (well, you can certainly try), just swish them around in your mouth for a bit, then swallow. Yes, just like that. LOL, it's a lot of fun eating this!

My handy spoon holder clip and my triangular molds


Sago Gula Melaka
Serves 4-5
Ingredients:
1 cup small sago pearls
1 cinnamon stick
5 cups water
200g gula melaka (coconut palm sugar), chopped into small pieces
300ml coconut milk, ready-made
a pinch of salt (optional)

Method:
1. Boil water and cinnamon in a pot and add the sago pearls, stirring well so they don't clump together. Let it simmer for 15 minutes, stirring all the time. The pearls will turn transparent but there will still be a dot of white in the middle. Turn off the heat, put the lid on and leave for 10-15 minutes more.
2. The pearls will have all turned transparent, meaning that they're cooked. Bring pot to the sink, add lots of water to the hot sago in the pot and stir so that the sago pearls separate. Remove the cinnamon and pour the sago through a metal sieve over the sink. Stir with a spoon so that the starch (which feels gluey) will run through the sieve, leaving just the sago pearls.
3. Rinse enough individual molds or a big bowl (easier if you are serving it to a large group) and scoop sago pearls in. The rinsing part serves to wet the moulds so that it will be easier to turn the sago out later. Let sago cool in the molds, then chill in the fridge for at least 4 hours until very cold.
4. Meanwhile, heat the gula melaka (raw brown sugar made from coconut palm) with 4 tablespoons water in a small pot over low heat to melt the sugar. Do not stir, just let the sugar dissolve into a thin syrup, it will thicken slightly once cooled. If you let it cook further until it is thick, the sugar syrup will become crystallized again upon cooling.
5. Heat the coconut milk or coconut cream but do not let it boil. Add a pinch of salt if you wish this cream to be slightly salty.
6. Turn out the chilled sago pudding from their molds and to serve with the palm sugar syrup and lots and lots of thick, coconut milk. If you have some bananas or cantaloupe, slice them and serve with this pudding. They add an extra dimension and texture to the dish!

Disclaimer: Make sure your cholesterol level’s not off the charts before you eat this. This droolicious dessert is so totally good for the soul, however if you are lucky enough to have this often (as with all rich foods), your heart may not thank you for it!


Sunday, August 29, 2010

Cashew Crusted Dragonfruit Hearts and Matcha Cheesecake


You gotta hand it to boredom, it makes you do something you normally won't. Just like doodling on a piece of paper led to oh, say, the creation of the Teenage Mutant Ninja Turtles (the concept arose from a humorous drawing sketched out by Kevin Eastman during a casual evening of brainstorming with his friend Peter Laird), doodling recipes in my mind led to this slightly outrageous creation - Cashew Crusted Dragonfruit Hearts and Matcha Cheesecake.

Cashew nuts and biscuit base


Well, this dessert was not totally unfounded. I had leftovers that needed to be used up, and I didn't want to use them for anything that I normally do. There was half a dragonfruit from my scones session, some matcha powder from my churros post, half a packet of Digestives and a large jar of roasted cashew nuts left over from that day I cooked biryani rice and made my creamy pear-cashew sorbet. Oh, also a packet of cream cheese that I wanted to bake with but hadn't up to this point.


The mental doodle started with the cashews, condensed milk and matcha, three of my most favourite flavors in the world. The cheese was the anchor ingredient and made me think, okay, a cheesecake would be good. Then the visual part of my brain reasoned that I needed to brighten this dish up a little and what goes well with green? Yep, you guessed it, the ever dazzling fushia pink that dragonfruit provides! The hearts were originally supposed to be swirls on the green filling, but somehow I stopped swirling when I saw the much cuter hearts. Especially since they were fuschia pink hearts. Yeah.

Little fuschia hearts, for your sweetheart. Ask them to marry you, quick!
(Or if they already have, ask them to go with you on a romantic cruise, or out dancing ;-))


This cheesecake was surprisingly easy to make, and even easier to photograph! (No melting ice cream or precariously leaning food stacks, thank goodness). If you don't believe me, here's the recipe:

Cashew Crusted Dragonfruit Hearts and Matcha Cheesecake
Ingredients:
Pastry base:
2 cups Graham crackers or Digestives, crumbed
2 cups cashew nuts, roasted and finely chopped
¾ cup butter, melted and cooled

Cheesecake filling:
1 packet (250g) Philadelphia cream cheese
1 ½ cups sweetened condensed milk
2 eggs
½ small dragonfruit
1 tablespoon matcha powder

Method:
1. Preheat the oven to 180°C/325F. Grease an 11-inch pie pan and set aside.
2. Prepare the pie base: Place cashew nuts in a food processor until finely chopped and pour into a bowl. Crumb the biscuits the same way, then add this to the bowl of cashew nuts. Add the cooled, melted butter and mix well. Press crumb mixture onto the bottom and sides of the pie pan. Chill for 15 minutes in the fridge.
3. For the filling: In another mixing bowl, whisk the cheese until smooth, then add the condensed milk. Mix until combined before adding the eggs one at a time.
4. In the meantime, peel, slice and puree the dragonfruit in a blender. Divide the cheese batter into two portions. In one bowl add the dragonfruit puree, and into the other add the matcha powder.
5. Reserve about 3 tablespoons of the dragonfruit cheese batter for the hearts decoration. Pour the rest of this red batter onto the base of the pie dough and bake for 20-25 minutes until the top is slightly firm to the touch.
6. Take the pie tin out of the oven and carefully pour the matcha cheese batter on top of the dragonfruit layer.
7. Drop little dots of the extra dragonfruit mix on the matcha layer and run a knife through each of them to form little hearts and swirls.
8. Place it back in the oven and bake further for 25 minutes until a rod inserted into the centre of the pie comes out clean.
9. Let it cool for at least 20 minutes before serving.
PS. The bottom dragonfruit layer turned an orangey-pink color upon cooking, probably because it was in the heat for too long. The dragonfruit hearts on the top, meanwhile, retained their fuschia color. So strange, this cooking business!

Saturday, August 28, 2010

My Way With Pear Pt. 2 - Pear and Cashew Cream Sorbet


Remember this beautiful pear? Well, the fantasy continues. For my second pear recipe installment, I decided to make a lovely, tangy pear-lime sorbet. But wait, I say "sorbet" quite liberally here because after I threw in the roasted cashew nuts into the mix, the texture of this frozen dish turned cream-like. So I'm not quite sure if there's ever such a thing as a creamy sorbet, but  here it is. It's naturally sweetened, and melts lingeringly on the tongue (or, in my case, on the dish, in the bright sunlight).


On their own, the pear and cashew flavors are fairly subtle. This is where the lime came into play, because the tanginess of the citrus somehow enhances the sweet-tartness of the pear and the sweet-creaminess of the cashew nuts. Don't ask me how, it just does.

Pear and Cashew Cream Sorbet
Ingredients:
2 Forelle pears
1-2 large limes, squeezed
2 tablespoons honey
1/2 cup water
1 cup cashew nuts, unsalted and roasted

Method:
1. Peel, core and slice pears, place in the water and honey in a pan and poach for 10-15 minutes until the pears are soft. Leave to cool completely.
2. When cool, pour pears and poaching liquid into a food processor, add the lime juice and cashew nuts and blend until the nuts are finely ground.
3. Freeze in an ice cream maker, or if you don't have one, just freeze the mixture for an hour in a suitable, covered container. When the ice crystals start to form, scrape down the sides and blend again until smooth. Repeat this process two more times over the next 2-3 hours, then leave to freeze for 4 hours or overnight.
4. Serve on its own or with some thinly sliced pears soaked briefly in salted water.

I used small jelly molds to shape the sorbet. It was less messier to serve up and didn't melt as quickly!

Friday, August 27, 2010

My Way With Pear Pt. 1 - Forelle Pear Tart with Coconut Treacle Custard


I was out shopping recently when the beauty of these Forelle Pears literally stopped me in my tracks. These red and greenish-yellow speckled pears came all the way from South Africa, but they looked as freshly-picked as if they had been grown locally (yeah, wishful thinking, what with the heat and high humidity in the tropics!). So I grabbed a few of these and immediately ideas started popping in my head like papparazzi flashbulbs going off. Oh yes, I had plans for these babies!


The first thing I did when I got home was wash them, admire their beautiful form and multicolored skin in the waning light and quickly took some photographs. At that moment, I wished for two things - one, that I was a good enough painter so I could accurately capture the amazingness of these pears, and two, that I could just sink my teeth into one of them to get a taste of the juicy nectar (I couldn't, because I was still fasting).

Such torture, I know. But it is in these times of duress that I find my best ideas surfacing. Something about brain chemistry that's inexplicable (or maybe it is, if you're a brain scientist or psychologist), like in those movies when people who think they're about to die have rapid flashes of memories right back from childhood to well, the point of their impeding doom. Ok, like I said, I had plans.

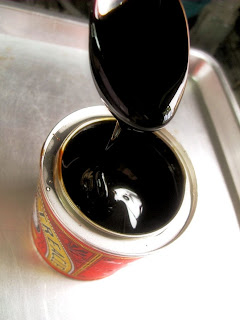
Black treacle in coconut cream


Since it was about 30 minutes to iftar (that's when I break my fast and can eat, drink and be an upright flower again), I had to think fairly quickly. There were some frozen puff pastry sheets in my freezer, and I'd been wanting to use the black treacle that I'd bought in some sort of dish so, voila! The idea of a superquick pear tart with a treacle custard came about. Only, fasting seemed to have wreaked havoc with my tastebuds, so I decided to throw in some coconut cream into the custard as well. There, doesn't Forelle Pear Tart with Coconut Treacle Tart sound lovelier?

Forelle Pear Tart with Coconut Treacle Tart
Ingredients:
1 Forelle pear, cored and sliced thinly
1 sheet frozen puff pastry (9 x 9 inch)
50ml coconut cream/milk
1 egg
brown sugar, to sprinkle
dash of grated nutmeg
egg, for glazing

Method:
1. Preheat the oven to 220C, and line a baking sheet with non-stick baking paper.
2. Thaw the puff pastry and when it is slightly softer, drape it over an 8-inch round baking tin or pie dish.
3. Whisk the egg with treacle and coconut cream lightly and pour into the centre of the puff pastry well.
4. Arrange the thinly sliced pears (I just left the skin on) in a round, fan shape over the treacle custard and fold the edges of the puff pastry inwards to create a self-containing "wall". Sprinkle brown sugar and nutmeg on top of the fruit. 
5. Brush tops of pastry with beaten egg to give it a shiny, golden glaze when cooked. Bake for 20 minutes and serve warm.


This pie made it on the table in time for iftar, and I finally got my wish to sink my teeth into a pear. The unusual flavors went surprisingly so well together, it was heavenly!


Wednesday, August 25, 2010

Diet-Buster Chocolate Oats Bar


If you're on a diet, or under the illusion that you are (what the heck are you doing here then?), then look away. Click on one of my other healthier posts, because this one is going to ruin your regimented eating, or you - whichever comes first.

However, if you're a balanced eater, or an A-list superstar with a personal trainer as lenient as Jillian Michaels, then stay. Enjoy the pictures, at least, even if you don't ever get to make (or eat) these decadent bars. Now, let me warn you that aside from the oats and um, tomatoes, every ingredient in this recipe spells D-A-N-G-E-R. That reads as "happiness", by the way. *grins*


OMG-icious!

Wouldn't you be happy if you had peanut butter, chocolate, condensed milk and yes, healthy oats pass through your lips in one go? Don't rub your nose when you answer, because I'd be happy. Of course, I'd only have one slice of these bars, or perhaps two, then I'd be running my ass off on the treadmill/roads before I lose myself completely. And then I'd have a slice more. LOL. Come on, you only live once!


Diet-Buster Chocolate Oats Bar
Yields: 3kgs or 10lbs on the hips

Ingredients:
½ cup butter
2 cups graham cracker biscuits or Digestives, crumbed
2 cups organic rolled oats
1 can (400g) sweetened condensed milk
1 cup chopped chocolate
¾ cup peanut butter
1/3 cup dried, candied tomatoes, chopped
Sea salt, to sprinkle

Method:
1. Preheat oven to 180°C/350°F.
2. Place the biscuits in a food processor to crumb them, then put in a bowl. Melt butter in the microwave and add to the biscuit crumbs. Mix with a spoon until combined.
3. Sprinkle biscuit crumbs into the bottom of a 9 x 13-inch pan and pat down firmly with the back of a spoon to create an even surface.
4. Add oats on top of the biscuit layer, and pat down evenly as well.
5. Pour condensed milk carefully over the oats layer, and by tilting the pan gently towards the four corners of the pan, you will be able to spread the condensed milk fairly evenly.
6. Bake in the oven for 25 minutes until golden brown.
7. Before you take out the baking tin, melt the chocolate and peanut butter in a pan over low heat, stirring constantly to prevent burning. Pour this mixture over the hot base, and tilt pan as before to ensure complete coverage by the chocolate. Sprinkle chopped dried fruits (I used candied tomatoes) and a pinch of sea salt on the chocolate layer.
8. Cool completely before chilling in the fridge for easy slicing.
9. Consume with a tall, cold glass of milk, and at your own peril!


Tuesday, August 24, 2010

I Am Naan The Batter For It


Hahaha... I couldn't resist, the pun was well-intended! Something to do with a type of leavened bread and the fact that I had nothing whatsoever to do with making it. Anyway, my haute kitchen was filled with earthy, bready, motherly smells last night. Only it wasn't my mother tinkering with a recipe in the kitchen. It was Diva D, who in some ways acts more like my mom than my real-life mother.


When I sauntered in, she was elbow deep in flour, kneading her way to some bread nirvana, as usual. Her well-thumbed, well-floured and much beloved "The World Encyclopedia of Bread and Bread Making" by Christine Ingram and Jennie Shapter was laid wide open in front of her. It was opened to page 240 - Naan. Ahhh... she was making naan, now that would be a first in our house! We don't have a hot, clay oven or tandoor in our home so I was interested to see how she would accomplish this feat. Turned out that a regular, electric oven and hot grill would do. Just turn up the heat real high, folks!

Page 240 - This is how naan is supposed to look like in the book.

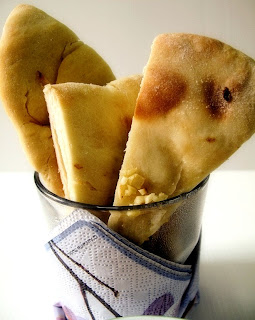
Okay, not too bad a rendition.

Homemade Naan
Makes 3 naans
Ingredients:
2 cups unbleached white bread flour
1/2 teaspoon salt
15g fresh yeast/ 1 packet dried yeast
4 tablespoons lukewarm milk
1 tablespoon vegetable oil
2 tablespoons plain yogurt or cream
1 egg
2-3 tablespoons melted ghee or butter, for brushing

Method:
1. Sift the flour and salt together into a large bowl. In a smaller bowl, stir in the yeast with the milk until it is dissolved. Set aside for 15 minutes.
2. Add the yeast mixture, oil, yogurt/cream and egg to the flour and mix to a soft dough. Turn the dough out to a lightly floured surface and knead for about 10 minutes until smooth and elastic. You can also use a stand mixer with the dough hook attached for this purpose. (I would, but Diva D prefers kneading with her hands!)
3. Place dough in a lightly oiled bowl, cover bowl with a clean, dampened cloth and leave to rise in a warm place for 45 minutes, or until doubled in size.
4 Preheat the oven to its highest setting, at least 230C/450F. Place a heavy baking sheet in the oven to heat.
5. Turn the dough out on to a lightly floured surface and punch into the dough to knock it back. Divide into 3 equal pieces and shape into balls.
6. Cover two of the balls of dough with oiled cling film and roll the third into a teardrop shape about 25cm/10in long, 13cm/5in wide and a thickness of about 5-8mm/1/4-1/3 in.
7. Place the naan on the hot baking sheet and bake for 3-4 minutes or until puffed up.
8. Remove the naan from the oven and place under a hot grill for a few seconds until the top of the naan browns slightly. Wrap the cooked naan in a dish towl to keep it warm while rolling out and cooking the rest of the naan. Brush with melted ghee or butter and serve warm with meat or vegetable dishes, or with hummus as a dip.


Naan is a very versatile bread and great as a party dip as well. You can go crazy flavoring naan in different ways, here are some ideas:
Spicy naan: Add 1 tsp each of ground coriander and ground cumin to the flour. For extra fire, add 1 tsp chilli powder!
Poppy seed naan: Brush rolled out naan with a little ghee or butter and sprinkle poppy seeds, pressing them lightly to make sure they stick.
Peppered naan: As above, but just sprinkle top of naan with coarsely ground black pepper.
Herbed naan: Sprinkle rolled, buttered naan with dried or fresh rosemary or thyme.
Garlic naan: Sprinkle chopped garlic on top of rolled out, buttered naan before cooking.
Onion naan: Add 1/2 cup finely chopped or grated onion to the dough as you knead it the first time.
Wholemeal naan: Substitute wholemeal bread flour for some or all of the white flour.

There you go. Enjoy! 

Related Posts with Thumbnails